This post may contain affiliate links. Please read my disclosure policy.
 I have to be honest and tell you that I would love a do-over for this year so far. It’s been a difficult one, to say the least. I’ll get into some of it in posts to come probably.
But – I’m looking forward now, and this recipe is a good place to begin. It’s from my old blog actually, but a year-round treat that we always enjoy. The fact that it is dead easy doesn’t hurt either.
Making bread can seem daunting if it’s not been your thing before, but the more you do it, the easier it becomes. I grew up in a bread making family – both my Mom and her Mom went through periods when they made all of their own bread. I learned how to knead from them – how long, the best way to do it, how to tell when it’s ready.
What’s that you say? Your mom didn’t teach you how to knead homemade bread?
Not to worry – if you have a stand mixer, you don’t have to worry about kneading, because the mixer does all the work! Sweet, huh?
To tell you the truth, I rarely knead any bread by hand anymore, though some are more difficult to judge than others, as to how much is enough. I’m going to take the guesswork out of it for you though – this is a simple method, and one that has never failed me.
And because someone always asks – this recipe is perfected specifically for a large stand mixer, like a Cuisinart [which is the one I have] or a KitchenAid. [a reader alerted me to the fact that it is not recommended to go above speed 2 with the dough hook on a KitchenAid, so keep that in mind. Untill then, I hadn’t ever heard from anyone about any damage to their mixer, so use your own judgement] A hand mixer will likely not be powerful enough to get the dough kneaded properly. You can, of course make this bread by hand, but it will take considerably more effort. Just mix it like crazy after the first addition of flour, and then when all of the flour is mixed in, turn it out on a floured board and knead the heck out of it. if you have a stand mixer though, this is the way to go!
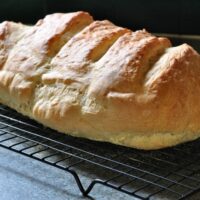
Stand Mixer Italian Bread
Ingredients
- 1 and 1/4 c very warm water
- 1 packet active dry yeast
- 1 teaspoon sugar
- 4 cups all purpose unbleached flour
- 1 & 1/2 teaspoon kosher salt
- water for brushing/spraying
Instructions
- In the bowl of the mixer, combine the water, yeast and sugar - stir lightly with a fork. It need not be totally combined. Allow to sit for 5 minutes.
- After 5 minutes the mixtures should look a bit bubbly. Add 3 cups of flour and the salt.
- Fit the mixer with the dough hook and at low speed, mix in the flour and salt, scraping down the sides of the bowl as needed.
- When the mixture is uniform, set the mixer to medium low and beat for 2 minutes.
- Turn off the mixer, and allow the mixture to rest for 20 minutes.
- After twenty minutes, turn the mixer back to low, and add the remaining cup of flour, 1/4 cup at a time, mixing until completely incorporated each time. If, after a couple of additions of flour, the dough is no longer sticking to the bowl, you need not add any additional flour. The dough should be fairly smooth at this point, and not sticking to the sides of the bowl at all - if it is still wet and shaggy, you need to add a bit more flour - another 1/4 cup should do it.
- Once you have a fairly smooth dough that has come away from the sides of the bowl, set the mixer to medium speed, and knead for 8 minutes. [ a KitchenAid mixer apparently should not be set above "2" when using the dough hook]This is the equivalent of about 20 minutes of kneading by hand, which is longer than I would knead a single loaf of sandwich type bread - it helps ensure a nice chewy texture though.
- Remove the dough from the bowl, and oil the bowl liberally, to prevent sticking. Put the dough back in, turn it a few times to coat it completely and cover with a piece of plastic wrap.
- Allow to rise for an hour, until doubled in size.

- Line a heavy baking sheet with parchment paper, and sprinkle it generously with cornmeal.
- Place the loaf in the middle of the baking sheet, and spray or brush lightly with water. I use a small spray bottle for this, as it is quicker and easier - you are going to do it a couple times during baking as well.
- Allow to rise for about 40.
- After 40 minutes of rising time, preheat the oven to 400º, allowing it to come fully up to that temperature. Place a flat pan with sides a couple inches high on the bottom rack, and fill with boiling water.
- Spray the bread with water again, making sure to wet the entire outside. Use a razor blade or very sharp knife to make diagonal slashes along the top of the loaf.
- Place the sheet pan in the oven, on the upper rack.
- Total baking time is about 30 minutes - spray the loaf with water after 10 minutes, and again 10 minutes after that. You can check for doneness with an instant read thermometer if you like - it will read right around 200 when the bread is done, or bake it until it is well browned all over, and sounds hollow when tapped on the bottom.
- Remove to cool on a wire rack for at least 20 minutes - the bread can be cooled fully and wrapped to eat later, or you can slice it up and dive right in.

There you go – perfect, and perfectly easy!
 Savory Chive Cream Cheese Scones
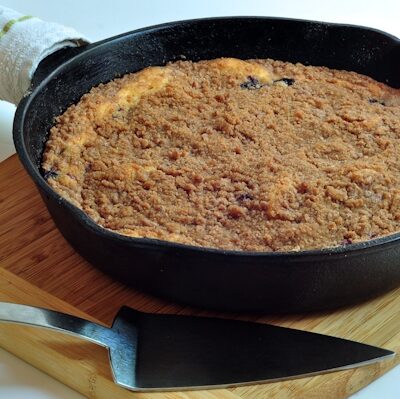 Blueberry Skillet Cake
 Apple Crisp Bars
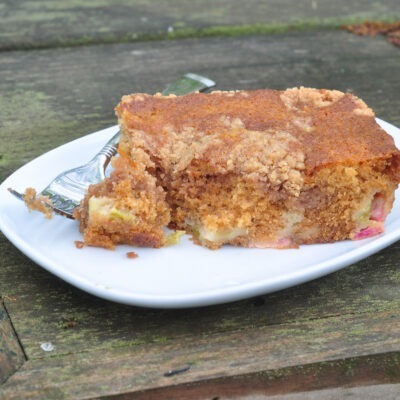 Easy Rhubarb Cake
 Molasses Apple Cobbler
 Apple Butter Caramel Bars
 Hazelnut Shortbread Cookies
 Cottage Cheese Dill Bread
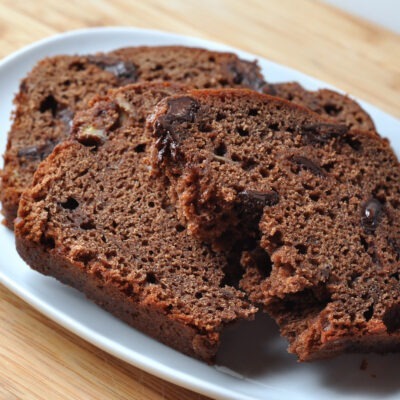 Double Chocolate Banana Bread
 Swedish Visiting Cake
Nothing beats the homemade bread! Your Italian bread turned out really great.
Thanks Angie!
This was a big failure for me. As others have commented, the ratio of flour to water was off in my experience. I only used 3.5 cups and dough didn’t come together well as it was much too dry and I couldn’t shape it at all. It might have worked if I had left it at 3 cups of flour or increased the water a bit but I’ll never know. Full disclosure, I am in a very dry environment and this isn’t the first time flour ratios in recipes have failed for me here. Anyone making this in a dry area will probably need to make adjustments.
I followed the instructions to a tee, but the bread came out a little boring in the taste category. Did I need more sugar? Salt?
Bradley- you could try to tweak it to adjust the flavors the way that you like them best. Adding a bit more salt or sugar is unlikely to change how well the recipe works. Thanks for letting me know.
I’ve missed you! Sorry you’re having such a tough year. Anyway, we love baking our own bread — so much better than what you buy. But a stand mixer really is the only way to go. This looks terrific — thanks.
Thanks so much John – it’s good to back 🙂
well it is in the last rise period now….I have done kitchenaid mixer bread for a while and they come out nice….my wife wanted Italian bread so this is my first try at it
….so far so good….also..l she loves garlic and onion …so I minced a few cloves and maybe a quarter of an onion and mixed it in..should be done in 2 hrs. or so
Other than fruit breads, I haven’t really made bread. This looks easy enough and I do have a stand mixer! Going to give it a try!
I already ate half the loaf. Me and my dog love it.
Glad that you both liked it! 🙂
Nothing beats the flavor if home made bread.
Your Italian version looks delightful.
Good to have you back!
I have missed seeing your posts!! I’m so sorry to hear that things have been difficult, but glad that you are getting back to posting again. I love how crusty this bread looks and the idea of using a spray bottle to wet it to get that crust. So smart!
I just received a KitchenAid stand mixer for Christmas and I didn’t even wait a day before I busted it out and tried this recipe 🙂 My bread turned out fabulous, so thank you for the great direction! One question I have is how I could get the bread a little crustier on the outside. I didn’t have a spray bottle so I used a pastry brush to wet the bread throughout baking. I loved how soft it made the bread but for variation in the future it would be great to know how to get a nice crust.
Thanks again!
Hi Stephanie – so glad you broke in your new mixer with my recipe! Getting a crustier crust with this simple of a recipe is not so easy. The bread you might buy at a bakery is probably the result of a much wetter dough, risen over a couple days’ time probably and then baked in a steam injection oven [maybe on your Christmas list for next year, LOL!]. We can mimic that by repeatedly wetting the loaf as it rises and bakes, so you can do it a few more times than the recipe calls for, which will help. A pan half filled with boiling water can be placed on the oven rack under the bread as it bakes – this will increase the crustiness a bit as well.
Make sure you cool the bread completely before packaging it up – any heat will turn into moisture in the bag, which will soften the crust. In fact, I often store breads like uncovered if I’m baking the day before – the crust will harden up a little more, but the inside will stay soft for a day. All the best in the New Year!
Stephanie, I am so glad that it worked well for you. You could try spritzing the bread a bit more while it is baking – the moisture cooking back out is what gives the crust a bit more crunch!
I too broke open a new stand mixer Hamilton Beach Professional and this was my first loaf of bread, ever. I messed up the fold on the loaf step so it looked funny but tasted great. French Toast tomorrow
I’m so glad this bread was how you chose to use your new mixer & so glad it came out well for you!
Your bread recipe turned out amazing! My family and I nearly ate the entire loaf in one evening!
~ Anna
Thanks Anna – so glad that you enjoyed it!
A brilliant success. I’ve never made such successful bread and so easily in my mixer. Living in France, I managed to find a comprehensive conversion table for US cup measure. However, you write 1 and a quarter ” c ” very warm water. Do you mean cups?. Also, normally recipes indicate tepid water so that it doesn’t kill the yeast. How does Very hot water work.
1 1/4 cups and I usually use water at 110 degrees for my yeast
When you say oil the bowl what king of oil do you mean?
Hi Courtney – I use olive oil, but any kind of vegetable oil will work.
Hi – I made your Stand Mixer Italian Bread. It is absolutely delicious, however, my bread kind of sunk in the oven and I have a, not flat, but not a nice round bread like you show. What did I do wrong? I thought I followed all the instructions to the letter. I got your recipe off of pinterest.
Hi Phyllis – not sure what might have gone wrong – too long a raise would do that, of not quite enough flour. Baking with yeast is not an exact thing, as there are always variations in the ingredients. I’m glad that it still tasted good.
Can I use bread flour? That’s all I have on hand?
I haven’t tested it with bread flour, because I wanted to make it easily duplicated for the average home cook, and bread flour may not be something they have on hand. I would give it a try if you like, but be cautious with the last cup of flour, only adding enough to get the right texture.
I am wondering the same thing. My first loaf was terrific but a finer crumb would be perfect.
Absolutely!
I love this recipe! Is the baking time the ae of you split into two loaves?
Can this dough be made into rolls instead of a loaf?
I am sure that rolls would work just fine – it would probably make about 18 to 24 dinner rolls.
I have never made homemade bread before and this was my first go at it. It came out AMAZING! The recipe was easy to follow and delicious! It looked and tasted as though I’ve been making bread for years! Thanks for the wonderful recipe!!!
I made your bread this morning and it turned out delicious. It was easy to prepare. I used my pizza stone and placed it in the 400 degree oven for 40 minutes during the second rise time. I added black sesame seeds to the top of the raw loaf for color and spritzed water 3 times over about a 20 minute period on the loaf as it was baking. The crust had a nice crunch and the texture inside the loaf was chewy and flavorful. Thanks for the recipe.
Melissa – I am so glad that the bread came out well for you & thanks for the nice review!
4 cups of flour to 1 1/4 c water? Mine seemed perfect until I tried to add that last cup of flour. Tried to add 1/4 at a time and could only get it to take 1/2 cup. Now the dough seems very dry. It’s kneading now. We’ll see what happens. Did anyone else think this was too much flour? Did I do something wrong?
Hi Mertle – thanks for your comment. It is important to remember that the recipe does say to add the last cup of flour in 1/4 cup increments, and only use it all if needed. I hope it came out well for you.
I also had that problem. I was wondering if it’s because I used bread flour instead of regular flour? I added a little more warm water. The dough is rising now, so fingers crossed that it’ll all work out.
I had same problem. Seemed like too much flour. Haven’t cooked it yet. Will try to follow up and let you know if it’s eatable. It’s on the last rise now
Hi Donna – it is important to remember that the recipe does say to add the last cup of flour in 1/4 cup increments, and only use it all if needed. I hope it worked for you.
I couldn’t get the last bit of flour in either, so I left it out. It’s on the last rise now so we’ll see.
There can be a great deal of difference in flours. It sounds like you figured it out though. Hope you love it!
Same thing happened to me
I’m sorry that you had trouble with the recipe. Many people have made it successfully, using the amounts as written. There are many variables in bread making, so it’s difficult to pinpoint why it didn’t work for you. I suspect your flour had a lower moisture content, which happens a lot. I will go back over the recipe, to see if I can do a better job of explaining. Again, I’m sorry.
I had the same problem the last cup of flour wasn’t mixing in with the rest of the dough. I added a little water and it mixed together. My problem was that the dough didn’t seem to rise. I let mine sit covered for over an hour and it didn’t look any bigger then when I first covered it. Same with after making it into the loaf shape I let it sit for 40 min but it didn’t look any different. I don’t know what I did wrong.
Chantale – I am very sorry to hear you had a problem with the recipe. It does sound as though your yeast had gone bad. Yeast kept at room temperature may spoil before the actual code date. I always keep mine in the freezer to prevent that problem.
It’s possible your yeast might be stale
That’s what mine did with last cup. Had to add more water. Hope it works 😬🤞🏾
I made this unbelievably delicious Italian bread! My husband said best bread I’ve ever made. Been experimenting with baking bread during the pandemic and have found a new passion. Thank you
Can this tecipe be doubl d?
Hi Kathy – I would think that this would be too much dough for a regular home stand mixer
My dough was too dry as well, I added a little water, then stopped adding flour. We’lll see how it bakes up
hi Suzanne – I hope it worked for you. It does say to add the last cup of flour in 1/4 cup increments, and only use it all if needed.
Can I use bread flour instead of all purpose?
Ginny – I haven’t tested the recipe with bread flour, but there’s no reason not to give it a try. Just add that last cup of flour cautiously, so that the dough doesn’t become too dry.
I’ve made bread for years and I agree with the posters who are saying the flour amount is too much. So far I’ve only used the initial 3 cups and it’s plenty. I may try to add 1/4 cup more but I don’t even think it’s necessary. Is there an error in the recipe?
Hi Brenda – thanks for your assessment of the recipe! For my kitchen, with my equipment and regular all purpose flour, there isn’t an error. It does say in the recipe to add that last cup of flour in 1/4 cup increments, and stop if the dough is pulling away from the bowl cleanly. Flour can vary widely in moisture content. I have made this recipe may times with these exact amounts and it works well with the amounts given. Many other commenters report the same. I hope you give it another try. ♥
Found this recipe on Pinterest and gave it a try. Turned out fantastic and was totally worth the time and effort! My crust was crispy and the inside was nice and soft. It was delicious and I will definitely be making it again
Was a project yesterday, but in the end it was worth all the work on a cold fall day.
It did give my mixer workout.
Hubby loved it.
Marilyn
Gladwin Michigan
So glad that you enjoyed it – thanks for letting me know!
Do you use the dough hook the whole time or change to the flat beater after initial mixing?
I use the dough hook the entire time. Hope it works well for you!
Can I bake this Ina round shape in a Dutch oven? How long and at what temperature in a dutch oven? Also would I still let it rise for an hour and then can I let it rise another 40 min in the round shape and then put it in thevpreheateddutch oven
I’ve not tried baking this recipe as you describe, so I’m not sure if this would work. You might want to look into a different recipe that has been tested for this method? Or, just give it a try and see how it comes out.
I followed your recipe exactly and this is the best bread I have ever made. I didn’t need all of the last bit of flour, but you said I might not and you were right. I will be making this every week now!
this was perfect – I only used part of the last bit of flour because it was enough.
So glad that it worked well for you!
I saw this recipe awhile ago, and finally got the chance to make it. It was really easy and we all thought it came out perfectly on the first try. I see more bread in our future!
Thanks Dennis – so glad it went well for you!
Honestly, the easiest bread I have ever made. People saying it was dry obviously really didn’t read the instructions – you only add that last bit of flour if it is needed. Love this stuff!
Thanks Vonnie – and thanks for the reminder for other readers 😉
I usually don’t use my stand mixer as the only kneading my bread gets. I many times do it by hand or stretch and fold. I gave this a shot because it had specific directions. Problem is is is too much flour. My dough did not come together nice after I added all the flour and I did end up adding a little water..
Probably a few tablespoons full. I did not get a nice “skin” and as it rose you could see where there will be holes in the bread.
Bread is now up to temp, but very pale.
Taste test will be later. Overall I am not happy with this recipe.
I wish I could send a pic.
Linda – I am very sorry to hear of your experience with the recipe. Your comment highlights to me that I really need to update the recipe overall, because it has been here on my blog for a very long time. It does mention in the recipe that all of the final cup of flour may not be needed, but perhaps I need to emphasize that more. It does also so say that it should be baked until it is nicely browned – it sounds like you are an experienced baker, and perhaps used to the idea that not all ovens are the same. Again, I apologize, and I will update this recipe in the coming weeks.
The bread is great but don’t knead the dough at medium speed. I just found out from KitchenAid that running the dough hook at a setting higher than 2 can void your warranty. If doing this breaks your mixer, KitchenAid may not be as accommodating as they were to me in replacing it.
My stand mixer is a Cuisinart, so I was unaware of this info – I will edit the recipe to reflect that recommendation. Thank you!