This post may contain affiliate links. Please read my disclosure policy.
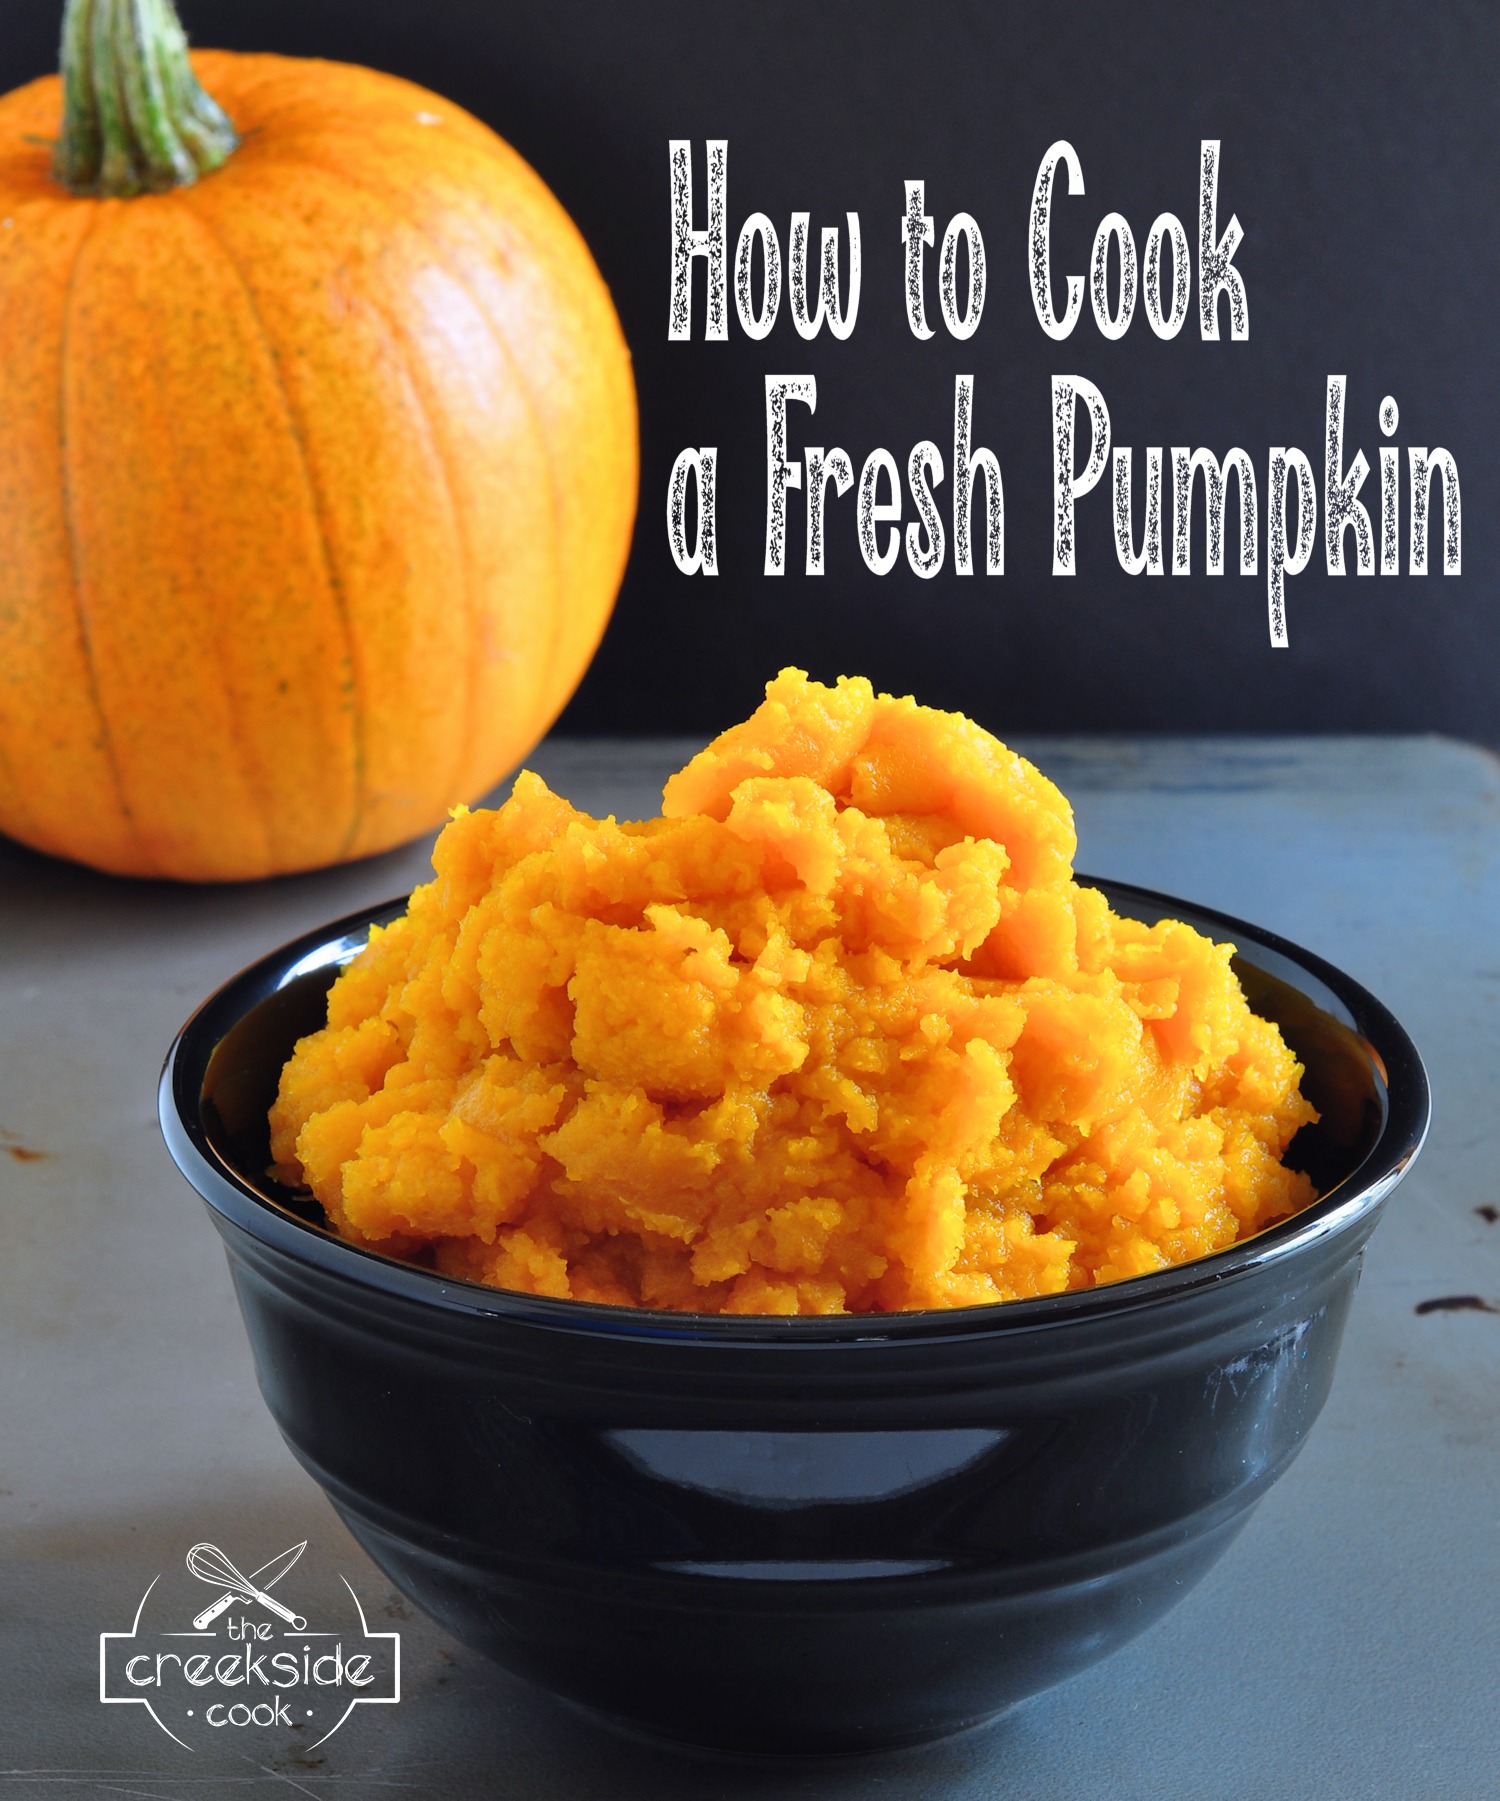
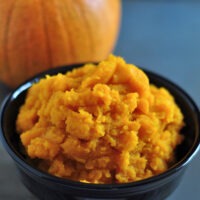
Cooking a fresh pumpkin for baking – it’s easy!
We are getting into fall here in Upstate NY, and for many of us, that means pumpkins. No – not pumpkin lattes! Real pumpkins out in the garden. They’ll keep for a while, but not forever. So, knowing how to cook a fresh pumpkin is a good skill to have in your repertoire!
Better than canned from the store
You can certainly use canned pumpkin from the store. But we like to be self-reliant. Often fresh pumpkins are on sale through September and October. The trouble is fresh pumpkins can be more watery than canned, but we are going to fix that, as you will see in a minute.
Some kinds of pumpkins work better than others
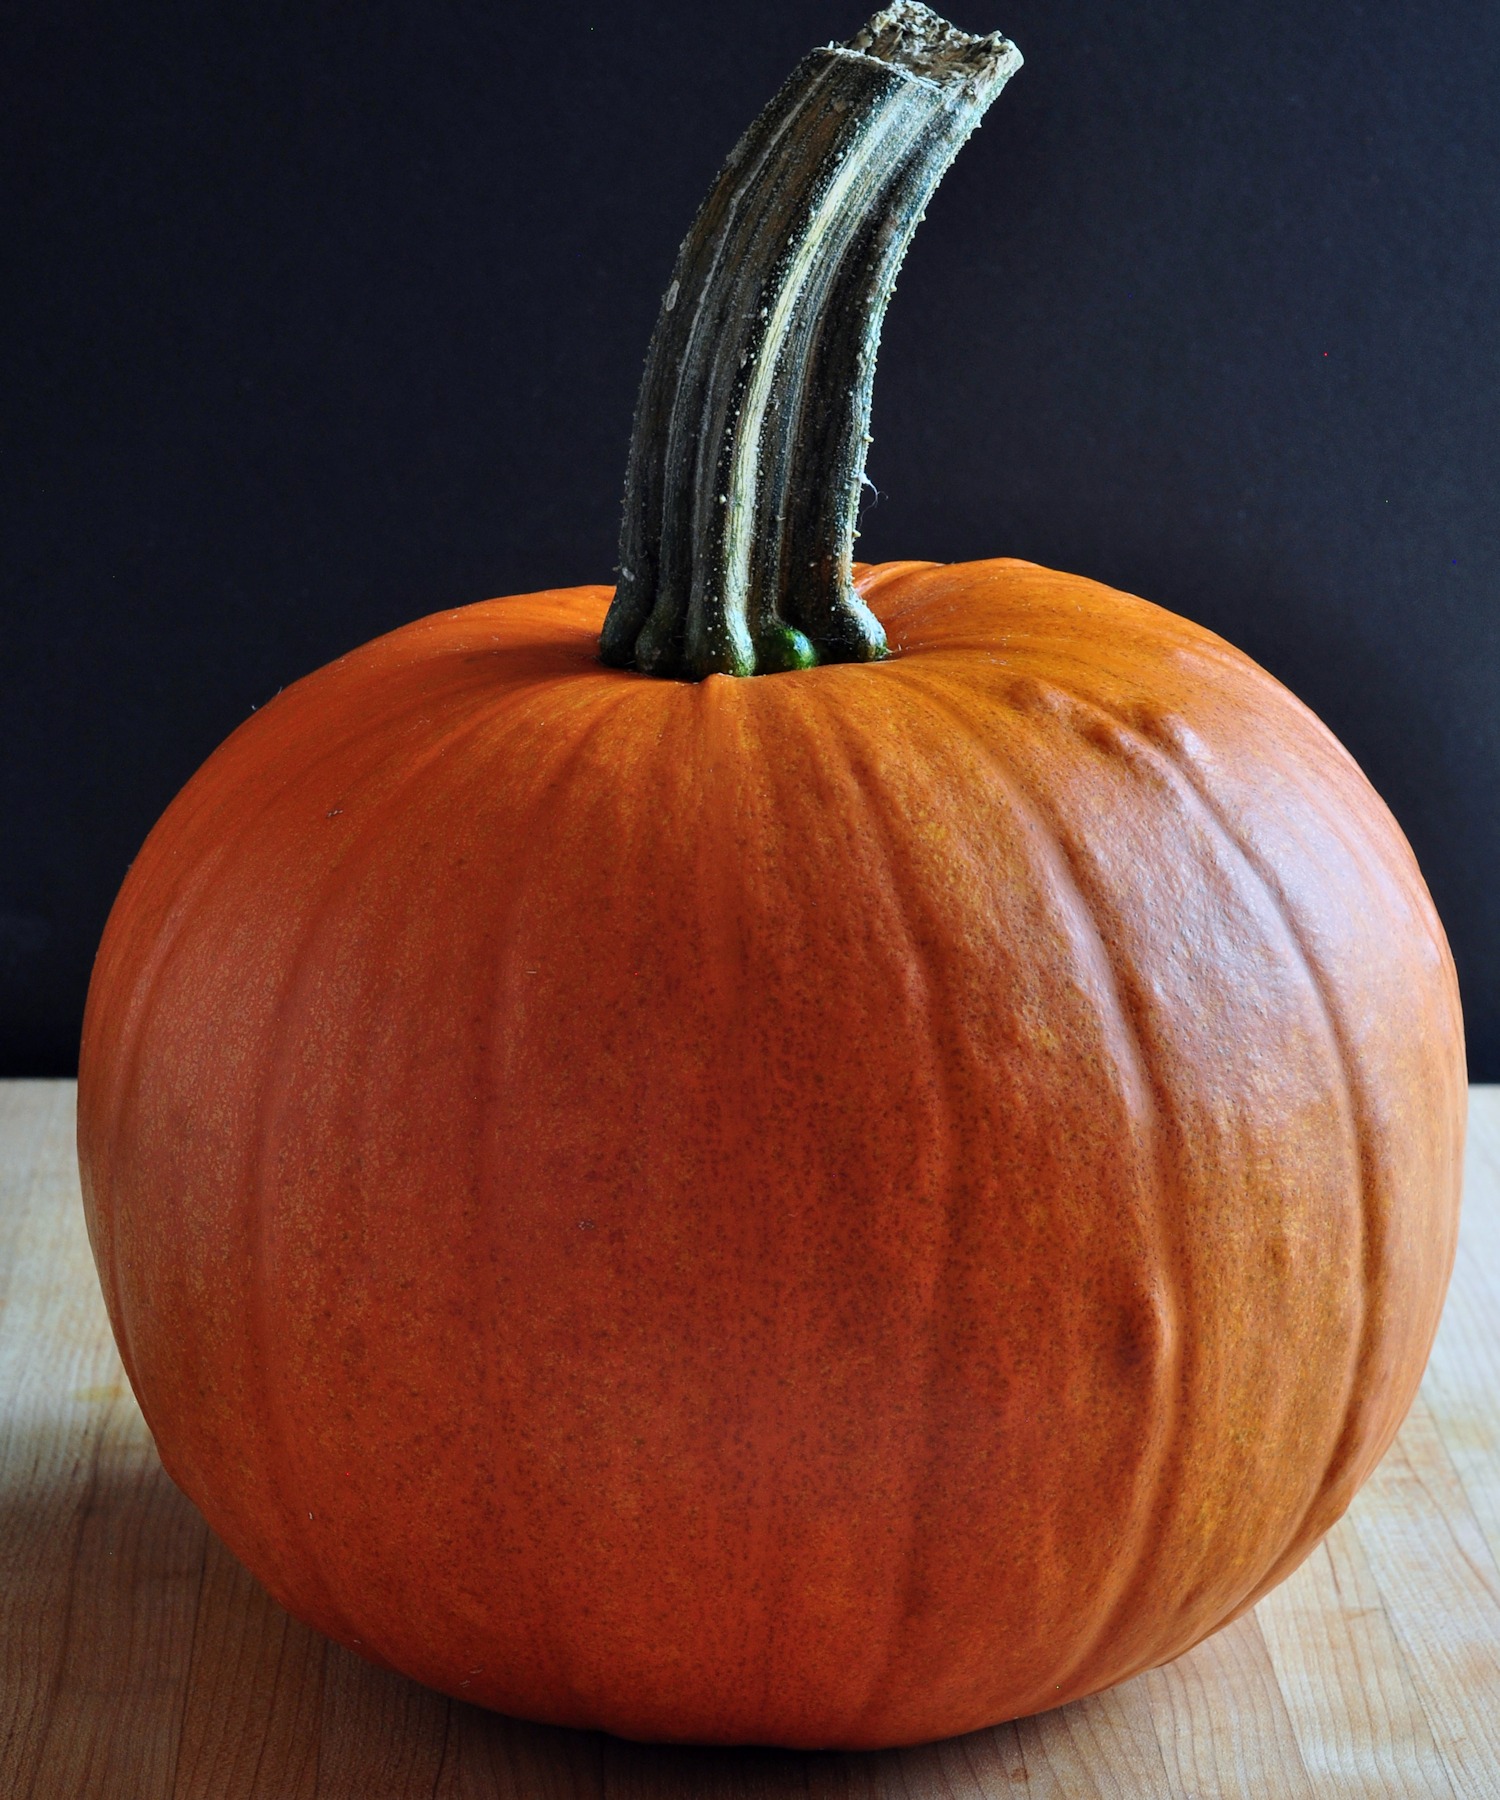
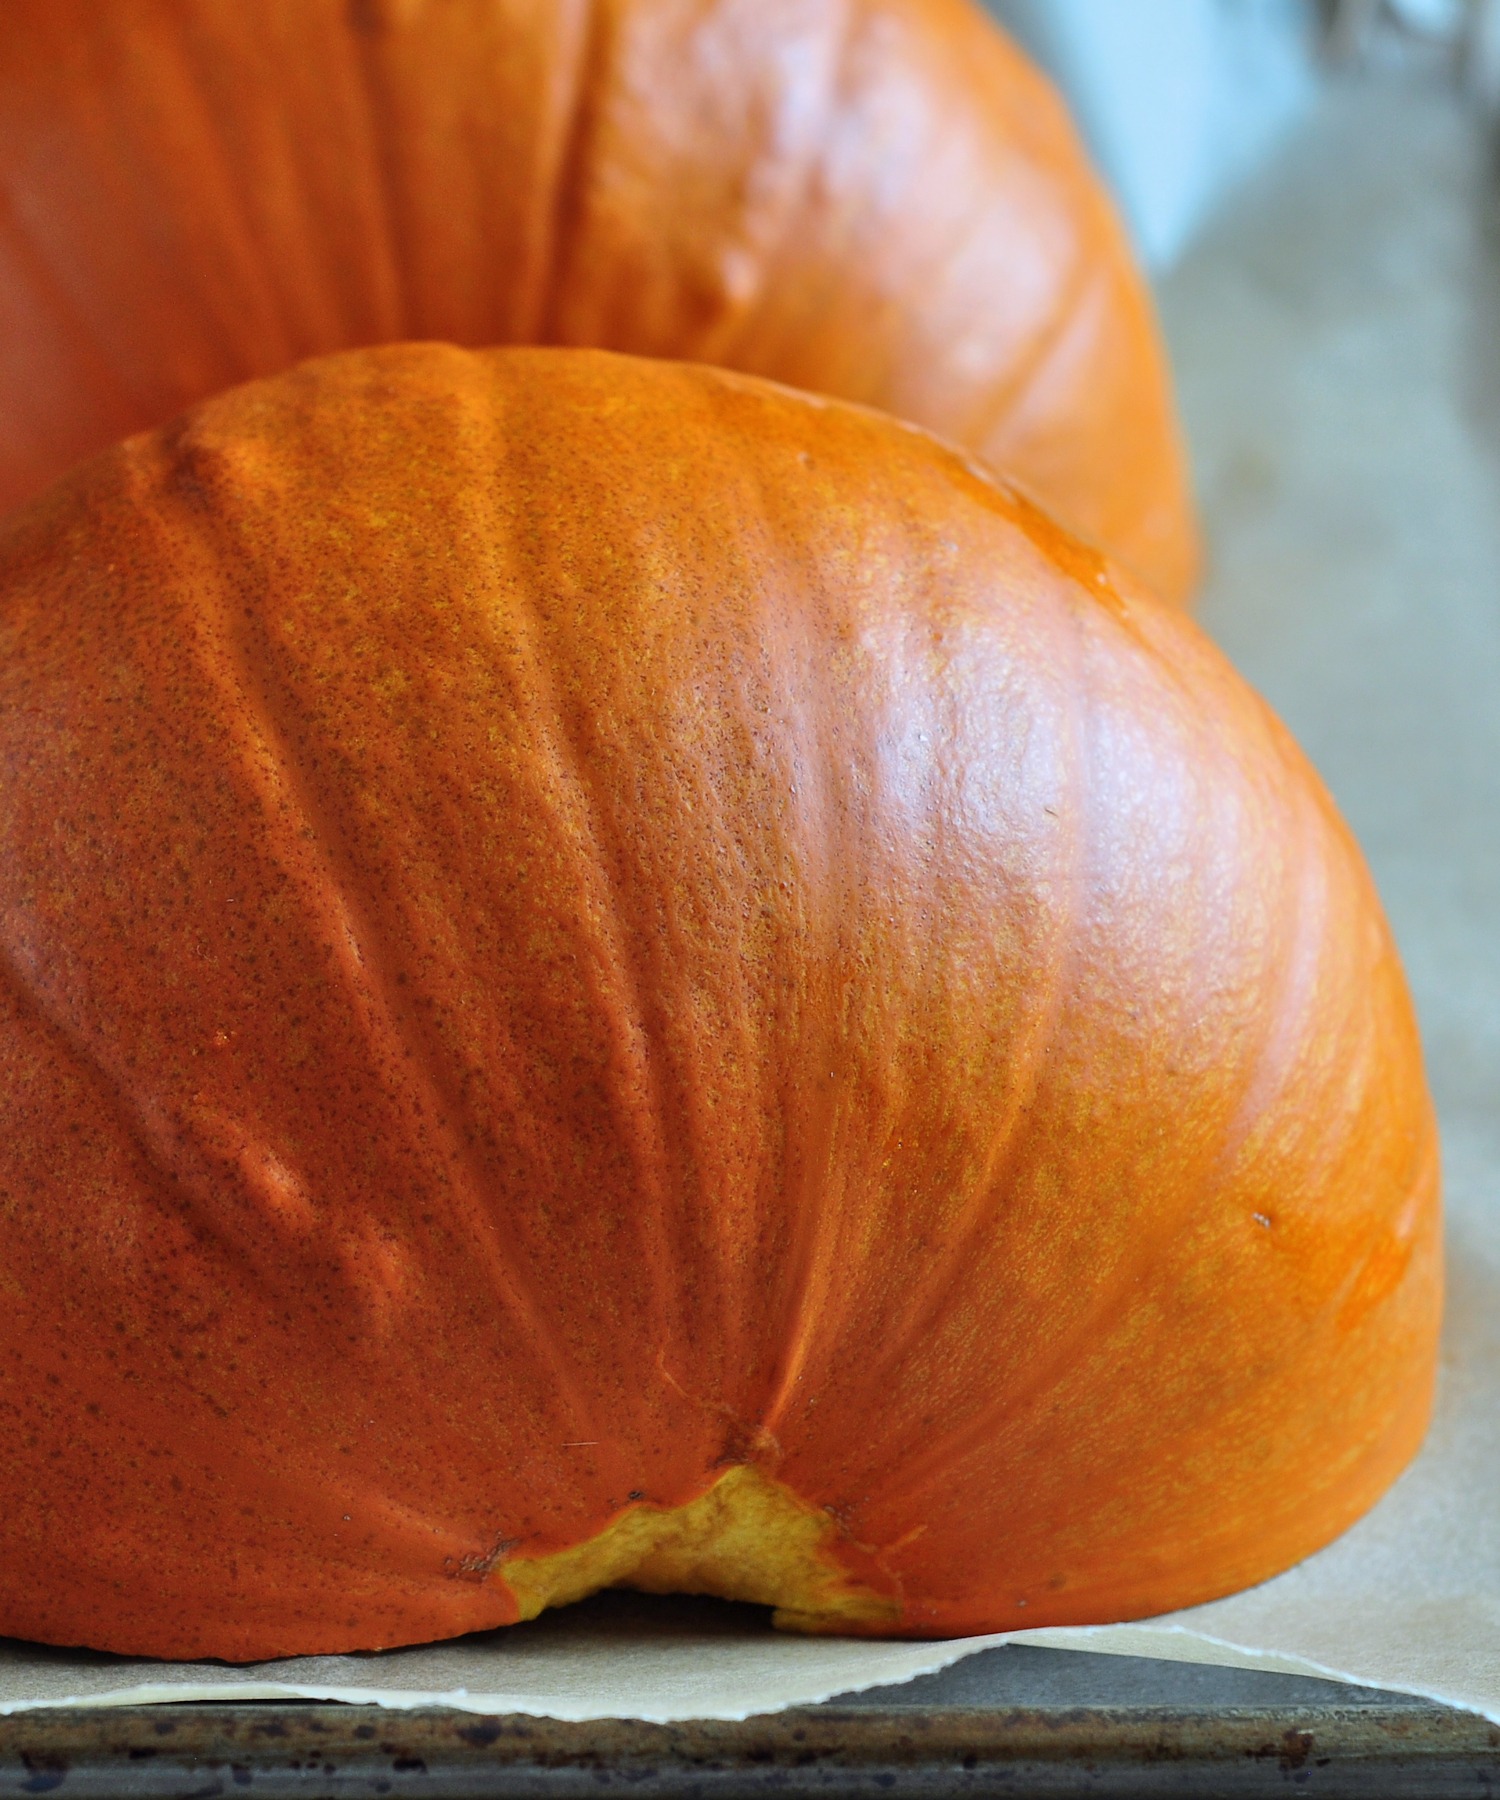
You have to begin by choosing the proper sort of pumpkin if you can find one. Now, you can actually cook with any kind of fresh pumpkin. But starting out with a pie pumpkin, or sugar pumpkin is going to help you end up with more pumpkin from less work. Pie pumpkins are smaller, often a little squatty-er in shape, and if you are fortunate, labeled as a baking, pie, or sugar pumpkin. They have drier flesh and thicker walls than a pumpkin you would use for decorating, or to make a jack o’lantern.
Looking for recipes using fresh pumpkin?
But any kind will work
On the other hand, I want to stress that virtually any pumpkin will work. If all you can find are the jack o’lantern type, I still encourage you to go for it. You can also try any of the exotic types, like a Cinderella pumpkin or the kind with blobby little warts all over. These are generally going to be more expensive, but they often have a deeper flavor, so they’re worth a try.
If push comes to shove, and you are unable to find a pumpkin? Any yellow/orange fleshed squash will also make delicious baked goods. You cook it exactly the same way. That canned pumpkin in the store? It’s actually a type of squash, called Dickinson. True story!

Ripeness is important
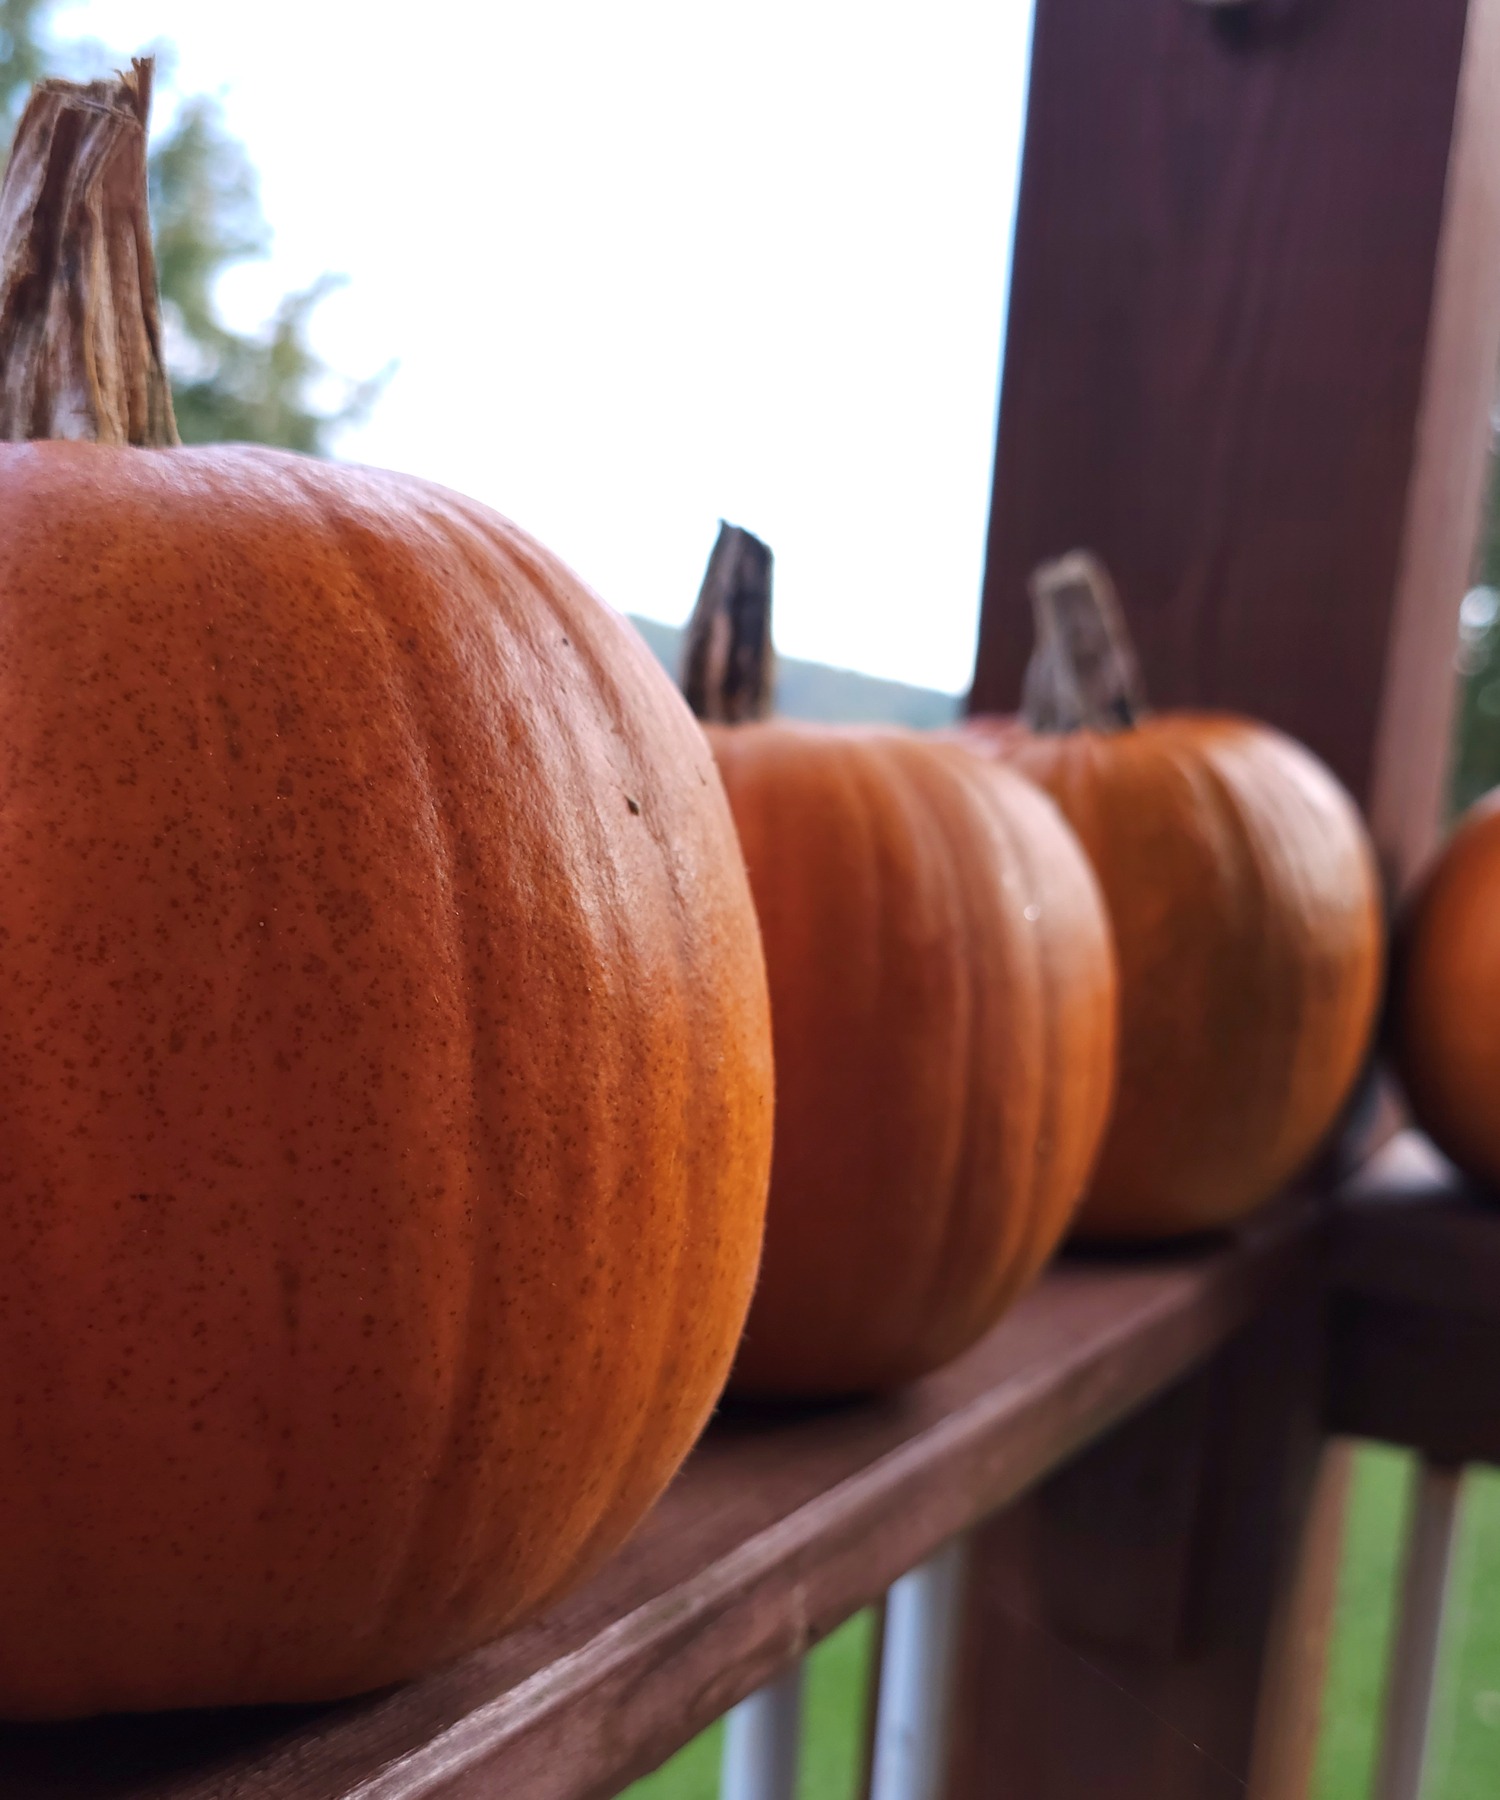
You also want to make sure the pumpkin you are going to cook is completely orange all over. That is how you will know it’s ripe, which will give you the best flavor. Pumpkins will actually keep well for a few months. You need a dry, cool place to put them, where there is no danger of them freezing. Generally speaking, they will have better flavor as they age. We only have a spot to keep them until the weather gets really cold though, so I got started on them already. Otherwise, I would suddenly have a bunch of pumpkins that must be cooked right now.
Start by washing the pumpkin
Begin by washing the pumpkin all over. Dry it off, so that it will not be slippery as you try to get it ready. Line a large, heavy baking sheet with parchment paper, and set the oven to about 400º. Knock the stem off the pumpkin by tapping it against the counter, or hit it with something heavy, like a rolling pin. Throw the stem away.
Cut it in half and scoop the seeds
Use a big chef’s knife, and cut the pumpkin in half from top to bottom. Take care not to get more than about 1/3 of the knife into the flesh, so you don’t get it stuck. If that happens, just tap on the back of the knife firmly with a rolling pin, or even a hammer, to work it on through. Once it is in two halves, use a large spoon to scoop out all of the seeds.
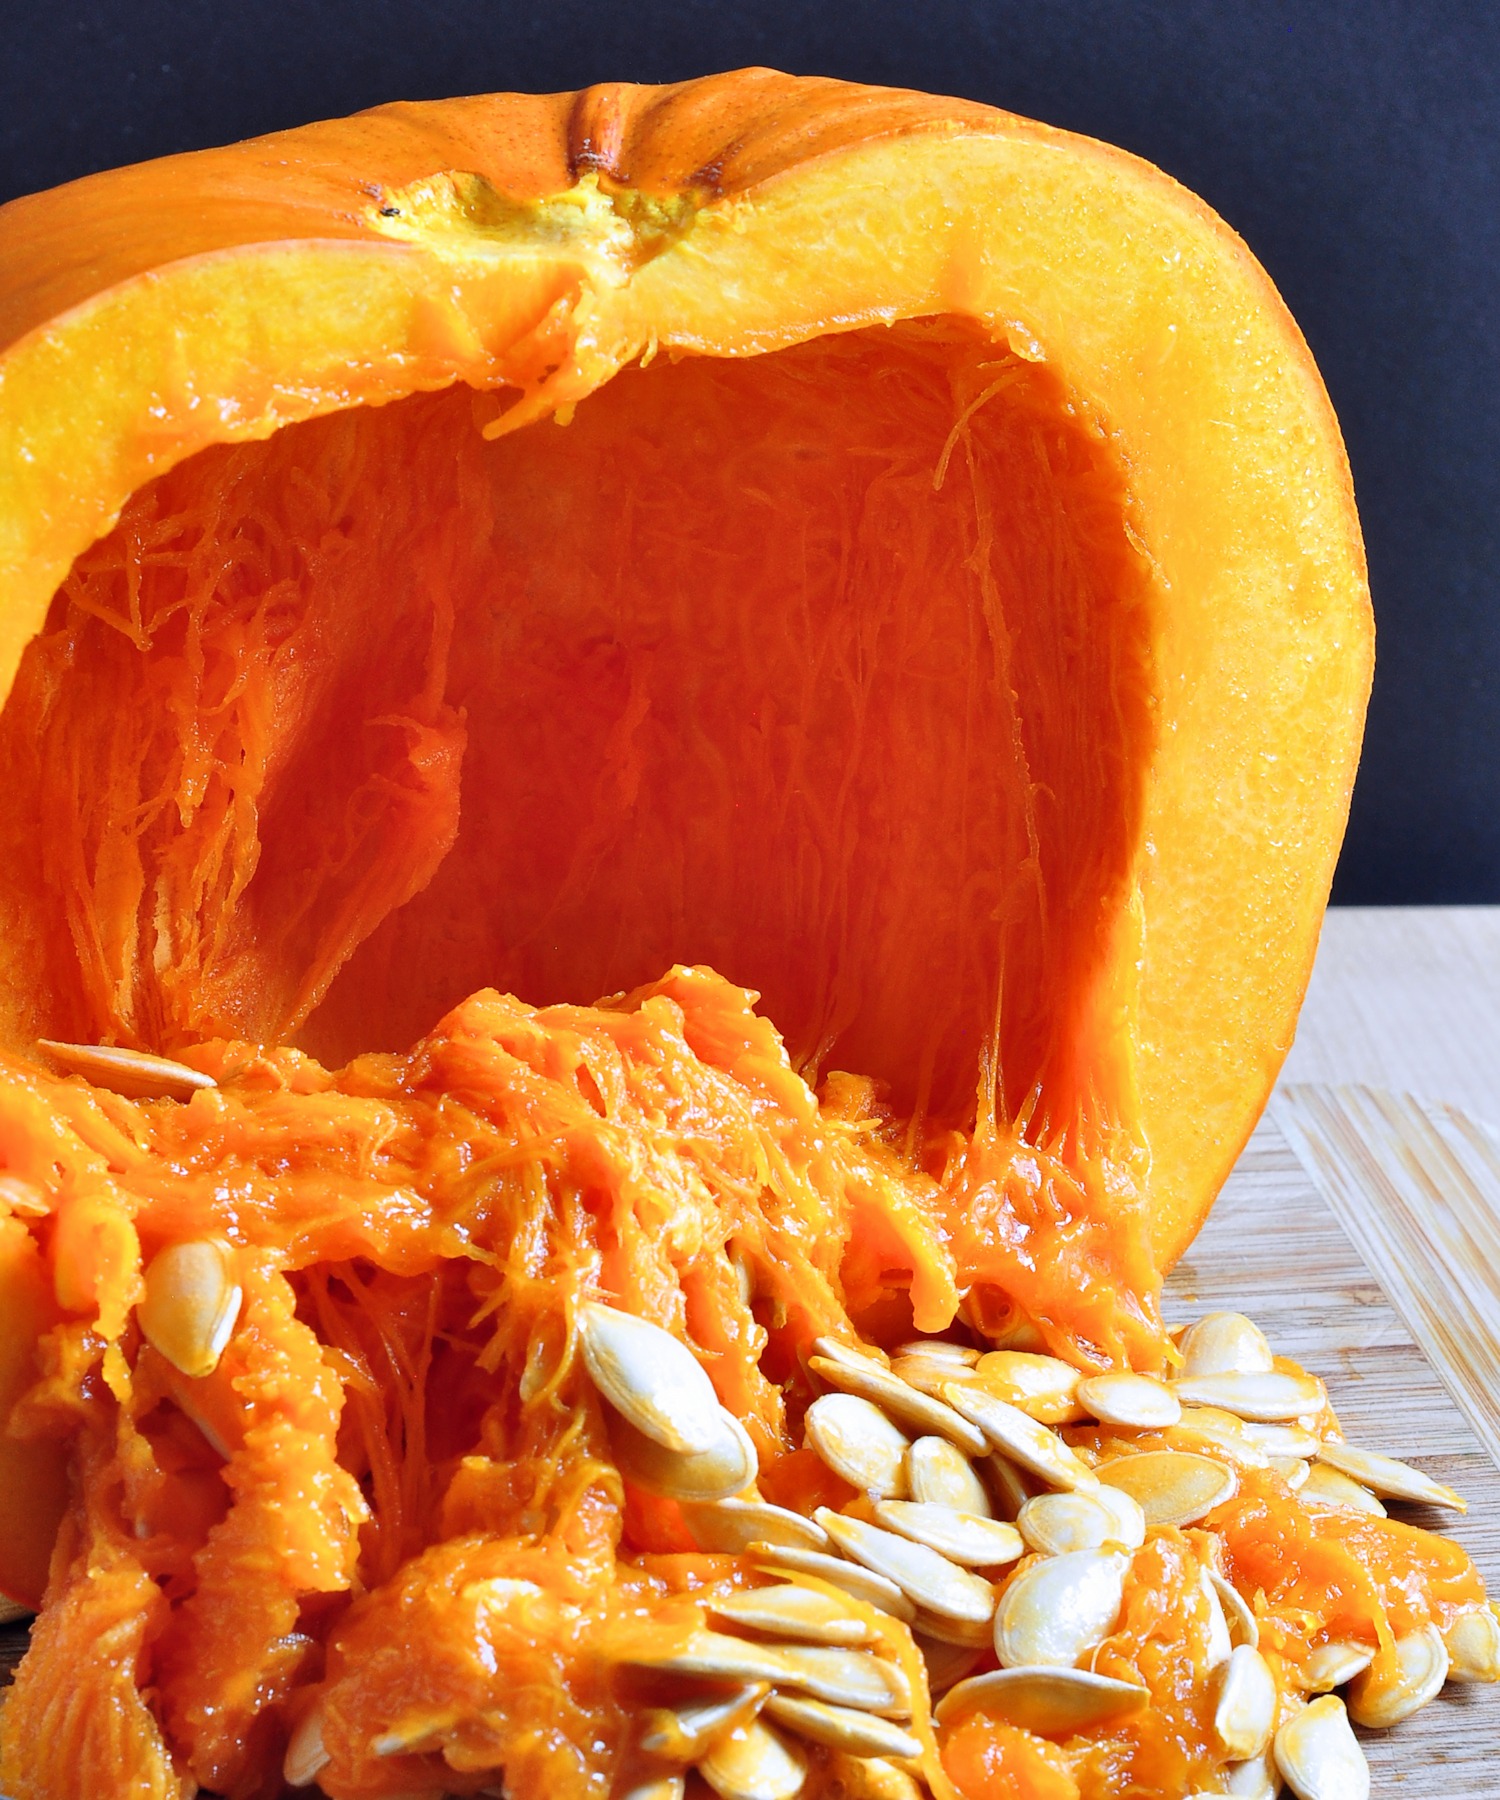
Save those seeds, if you want to make roasted pumpkin seeds – I’ll tell you how at the end of the post! [put them in cold water right away]
Baking the pumpkin
Lay the halves, cut side down on the parchment paper lined baking sheet. You can possibly fit two pie pumpkins on sheet pan, or use two pans. I usually use two pans and I can fit 3 or 4 pumpkins total.
Bake the pumpkin for 45 minutes to an hour, until a sharp knife easily pierces the side. Bigger pumpkins may take longer, smaller ones less.
Cool for a bit
Take the pan out of the oven, and carefully turn the halves over. This allows them to cool more quickly. You want them cool enough to handle comfortably, but the next part is easier if the pumpkin is still warm-ish.
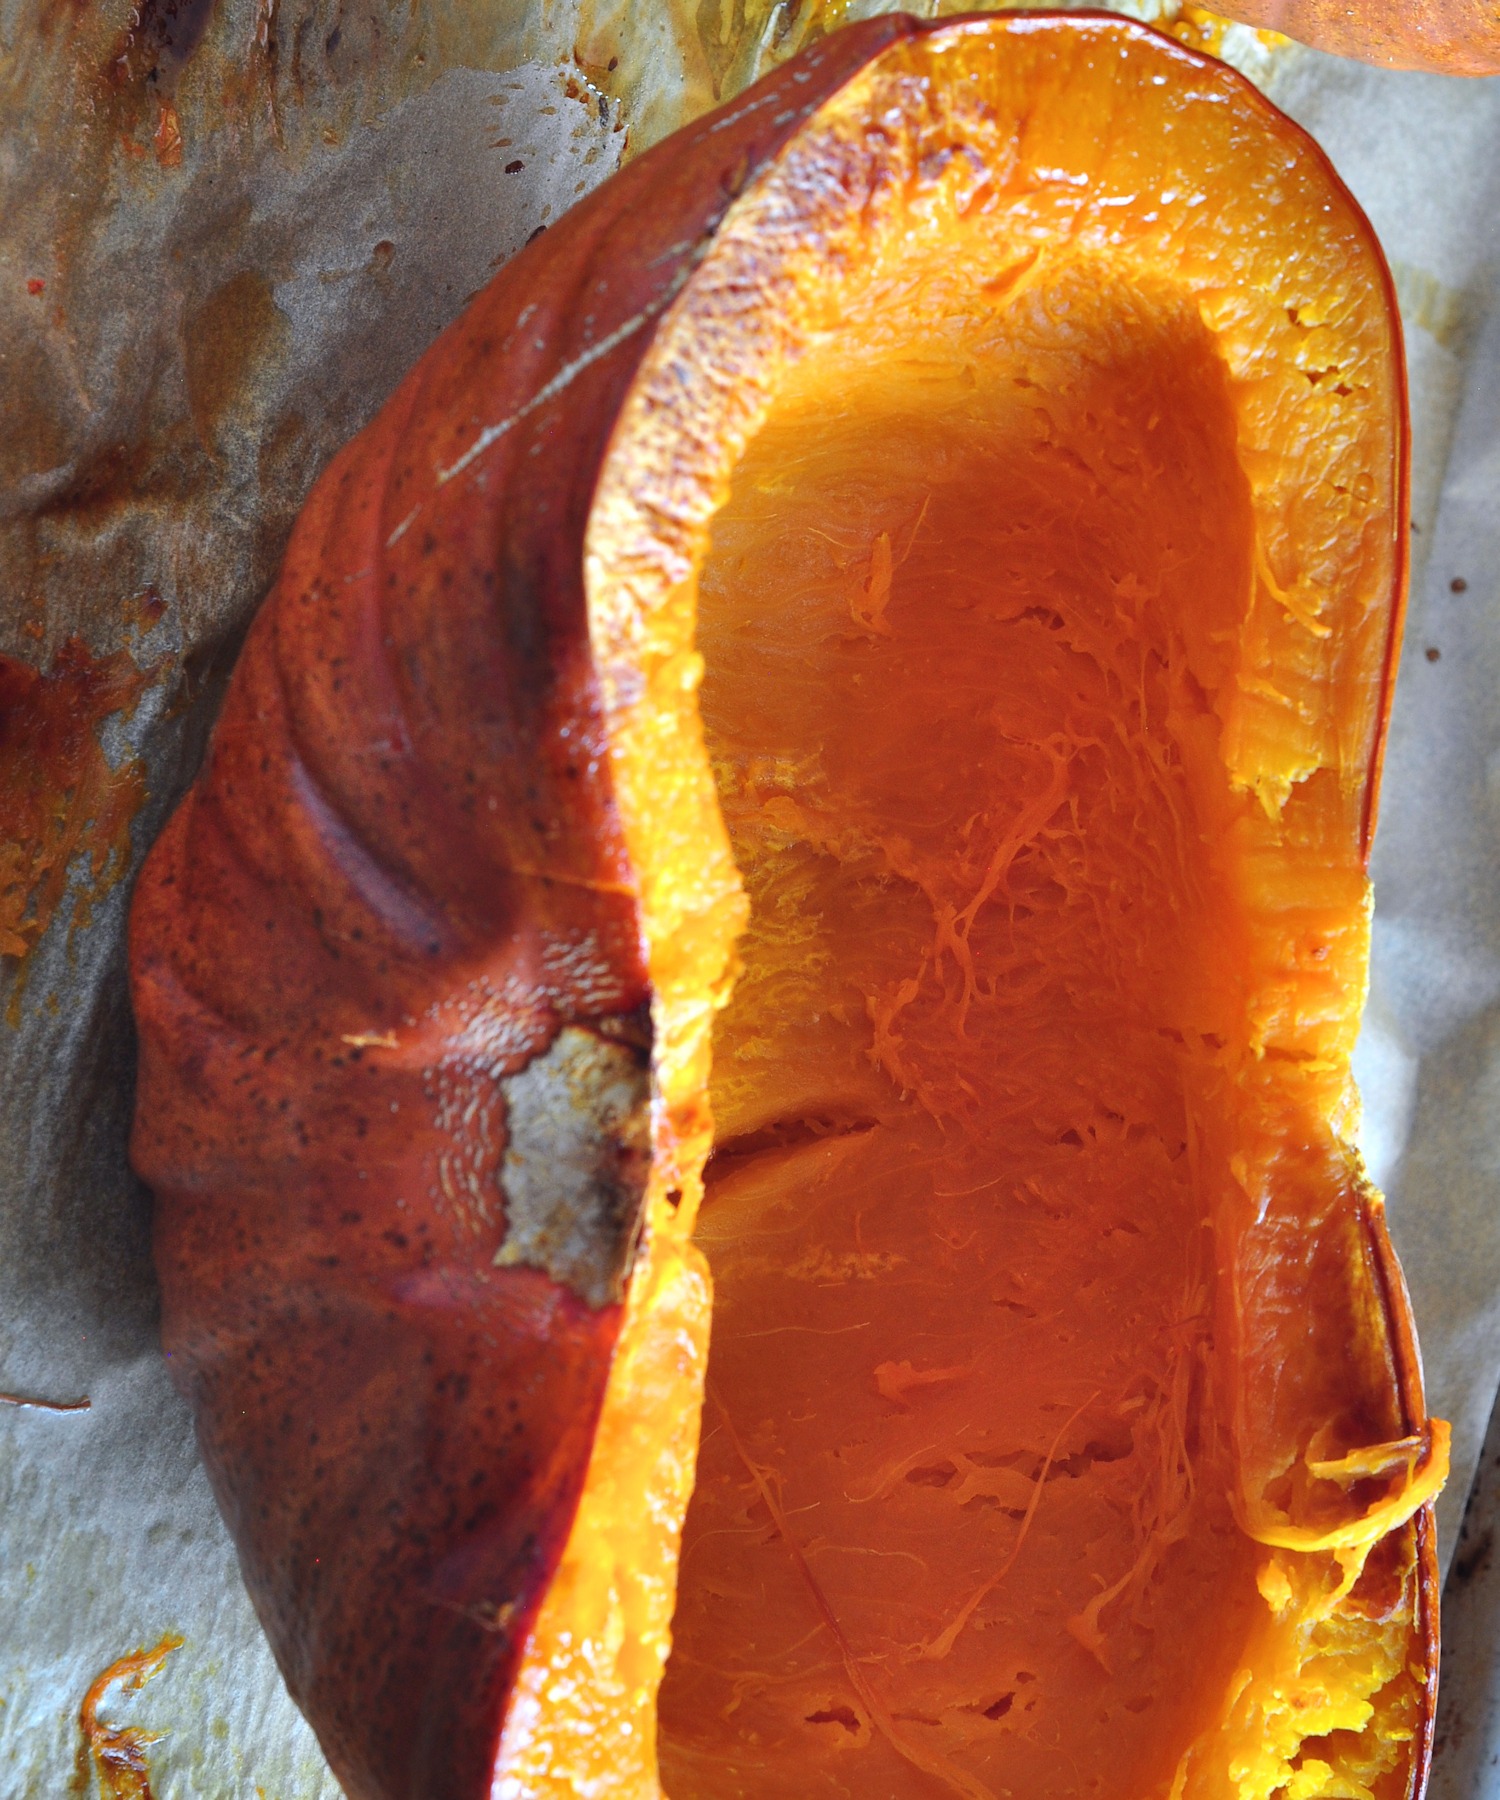
Scoop
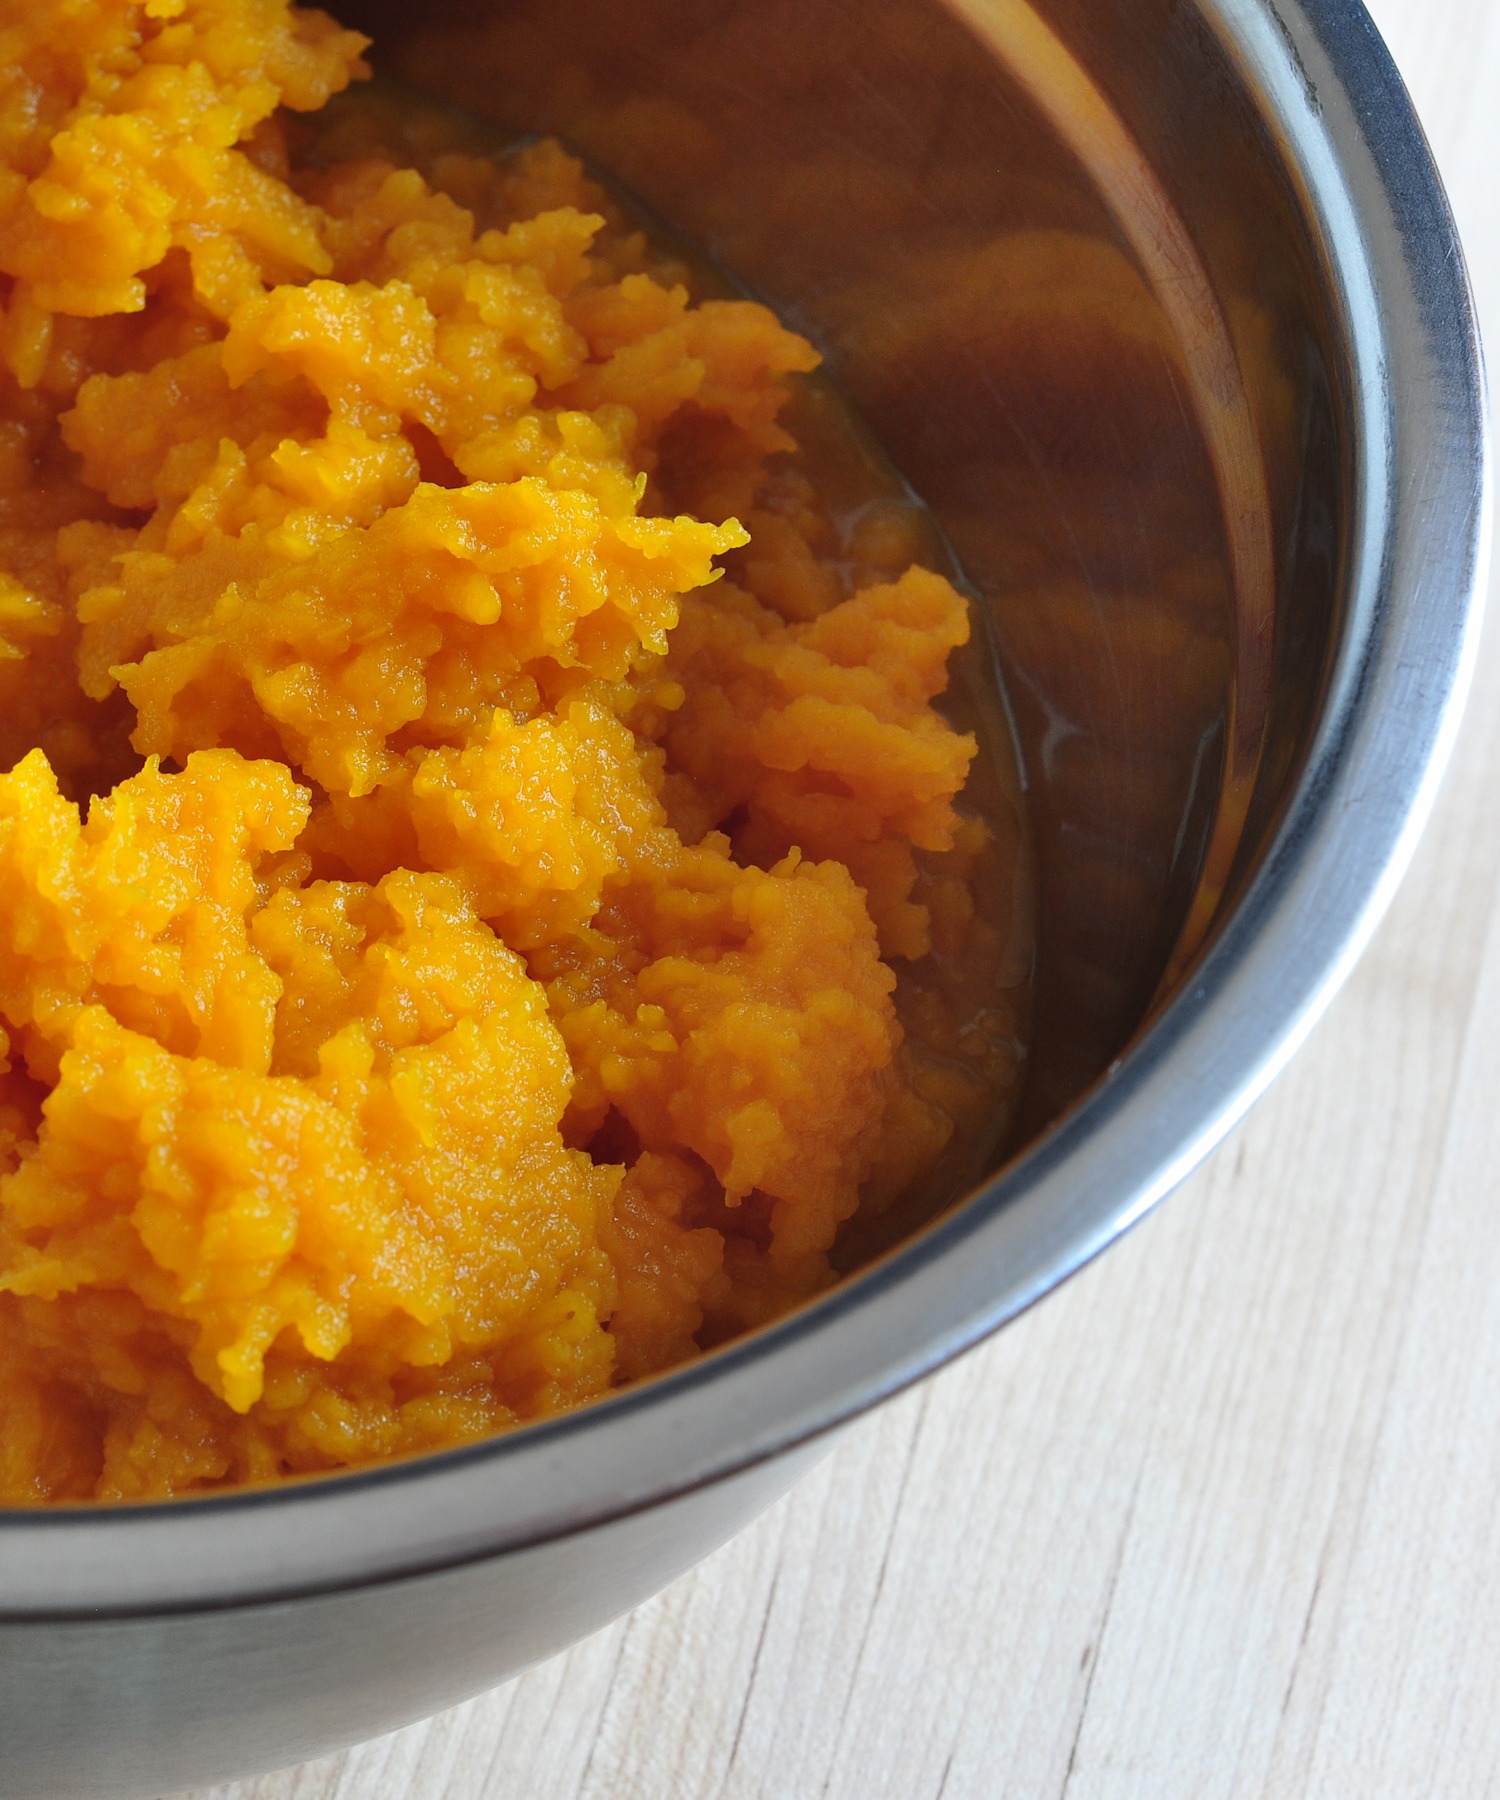
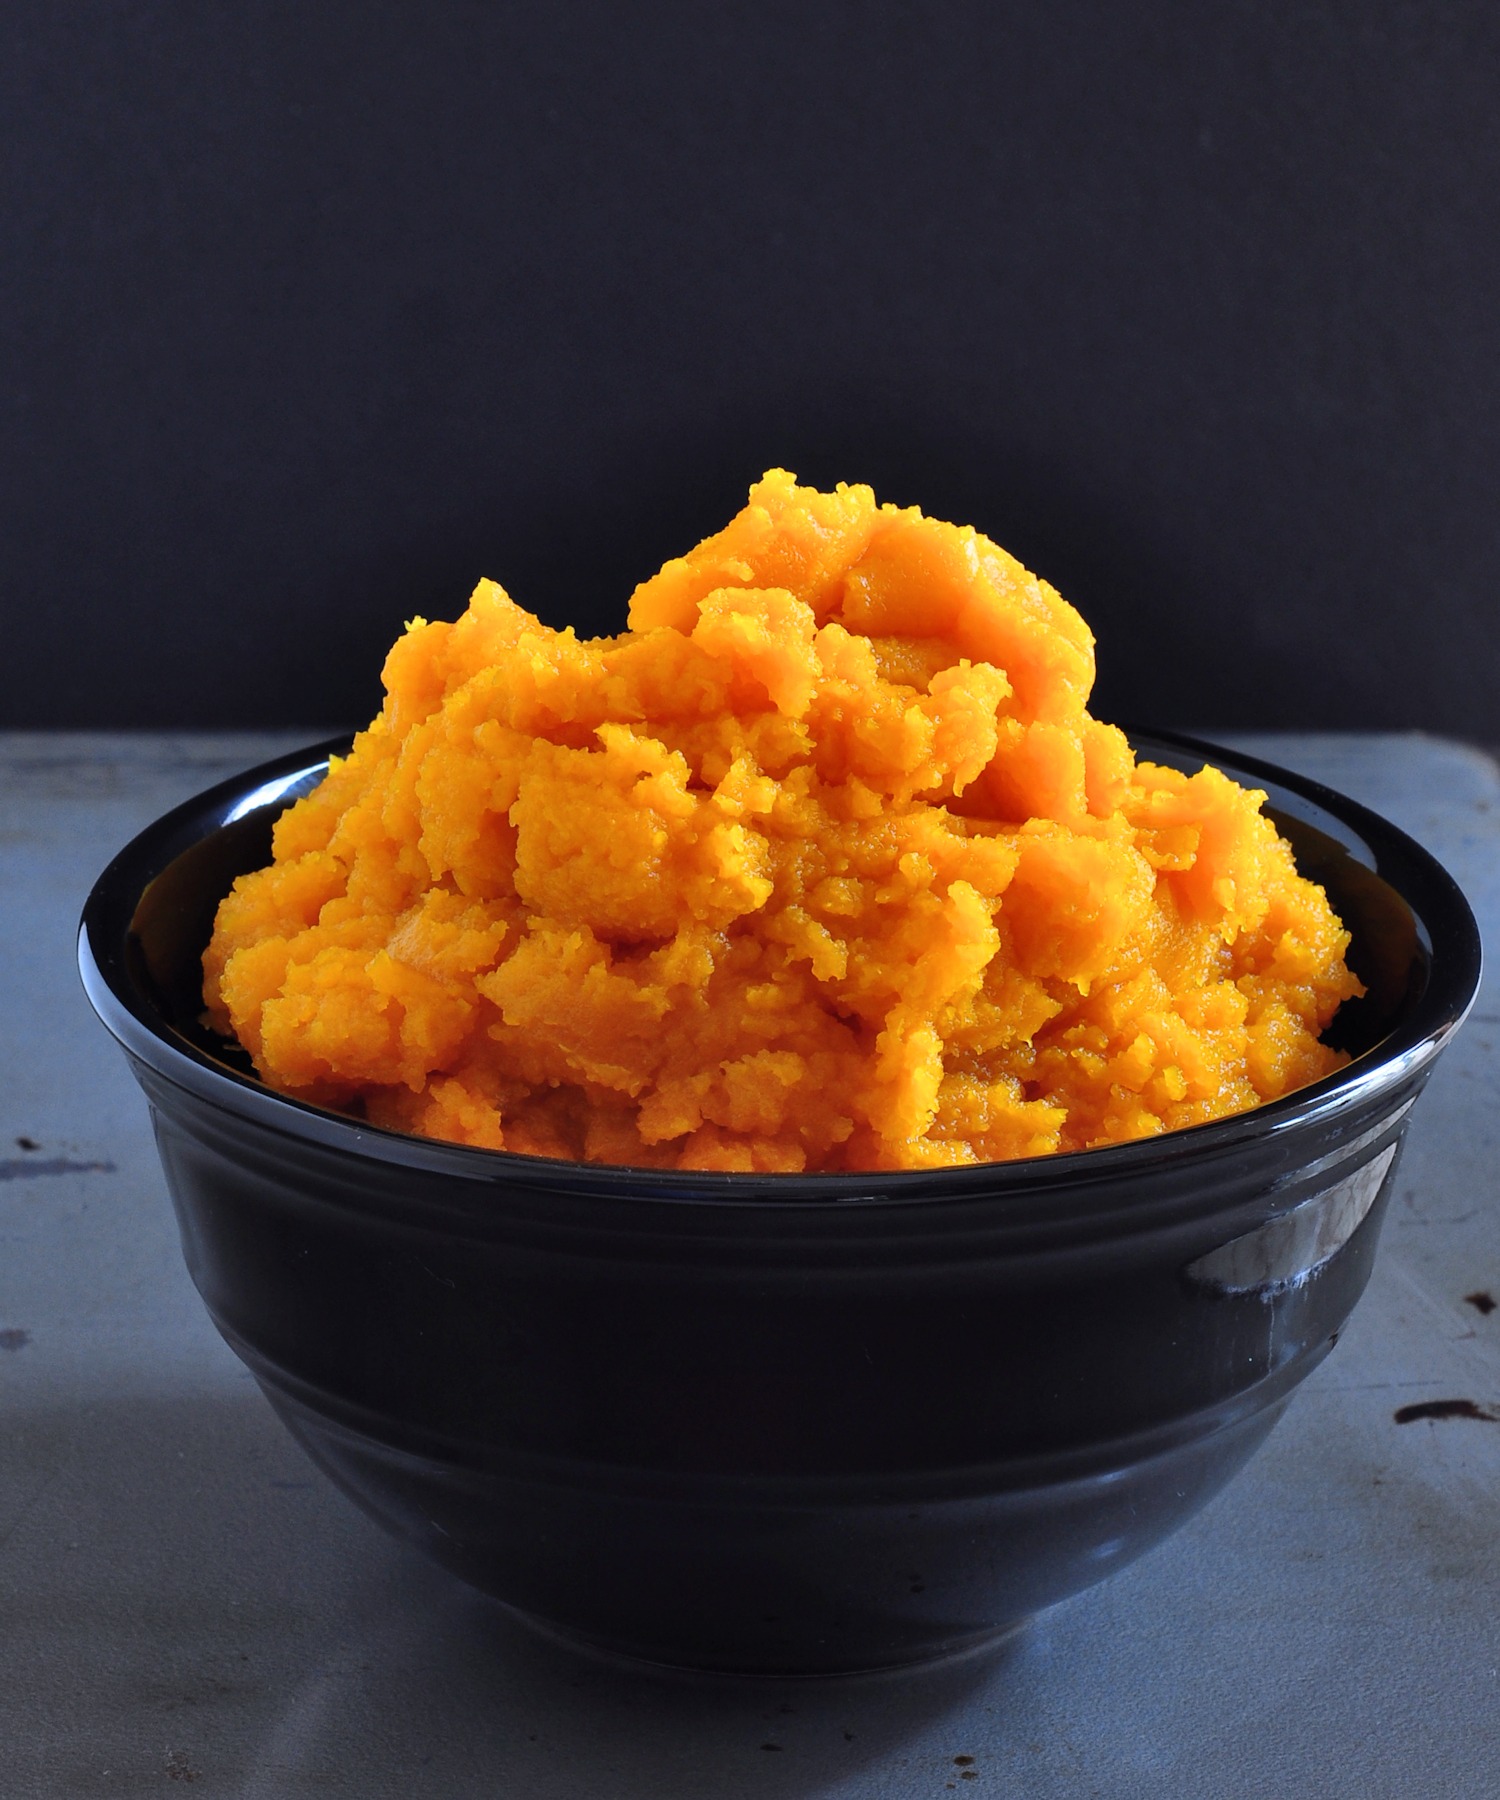
Scoop out all the cooked pumpkin, making sure not to get any of the skin. Place all of the flesh in a bowl as you scoop it out. You can usually get right down to skin without any trouble. But, as you can see in this photo, there is already some liquid accumulating in the bowl. If we don’t get rid of that, anything we use the pumpkin for will be runny.
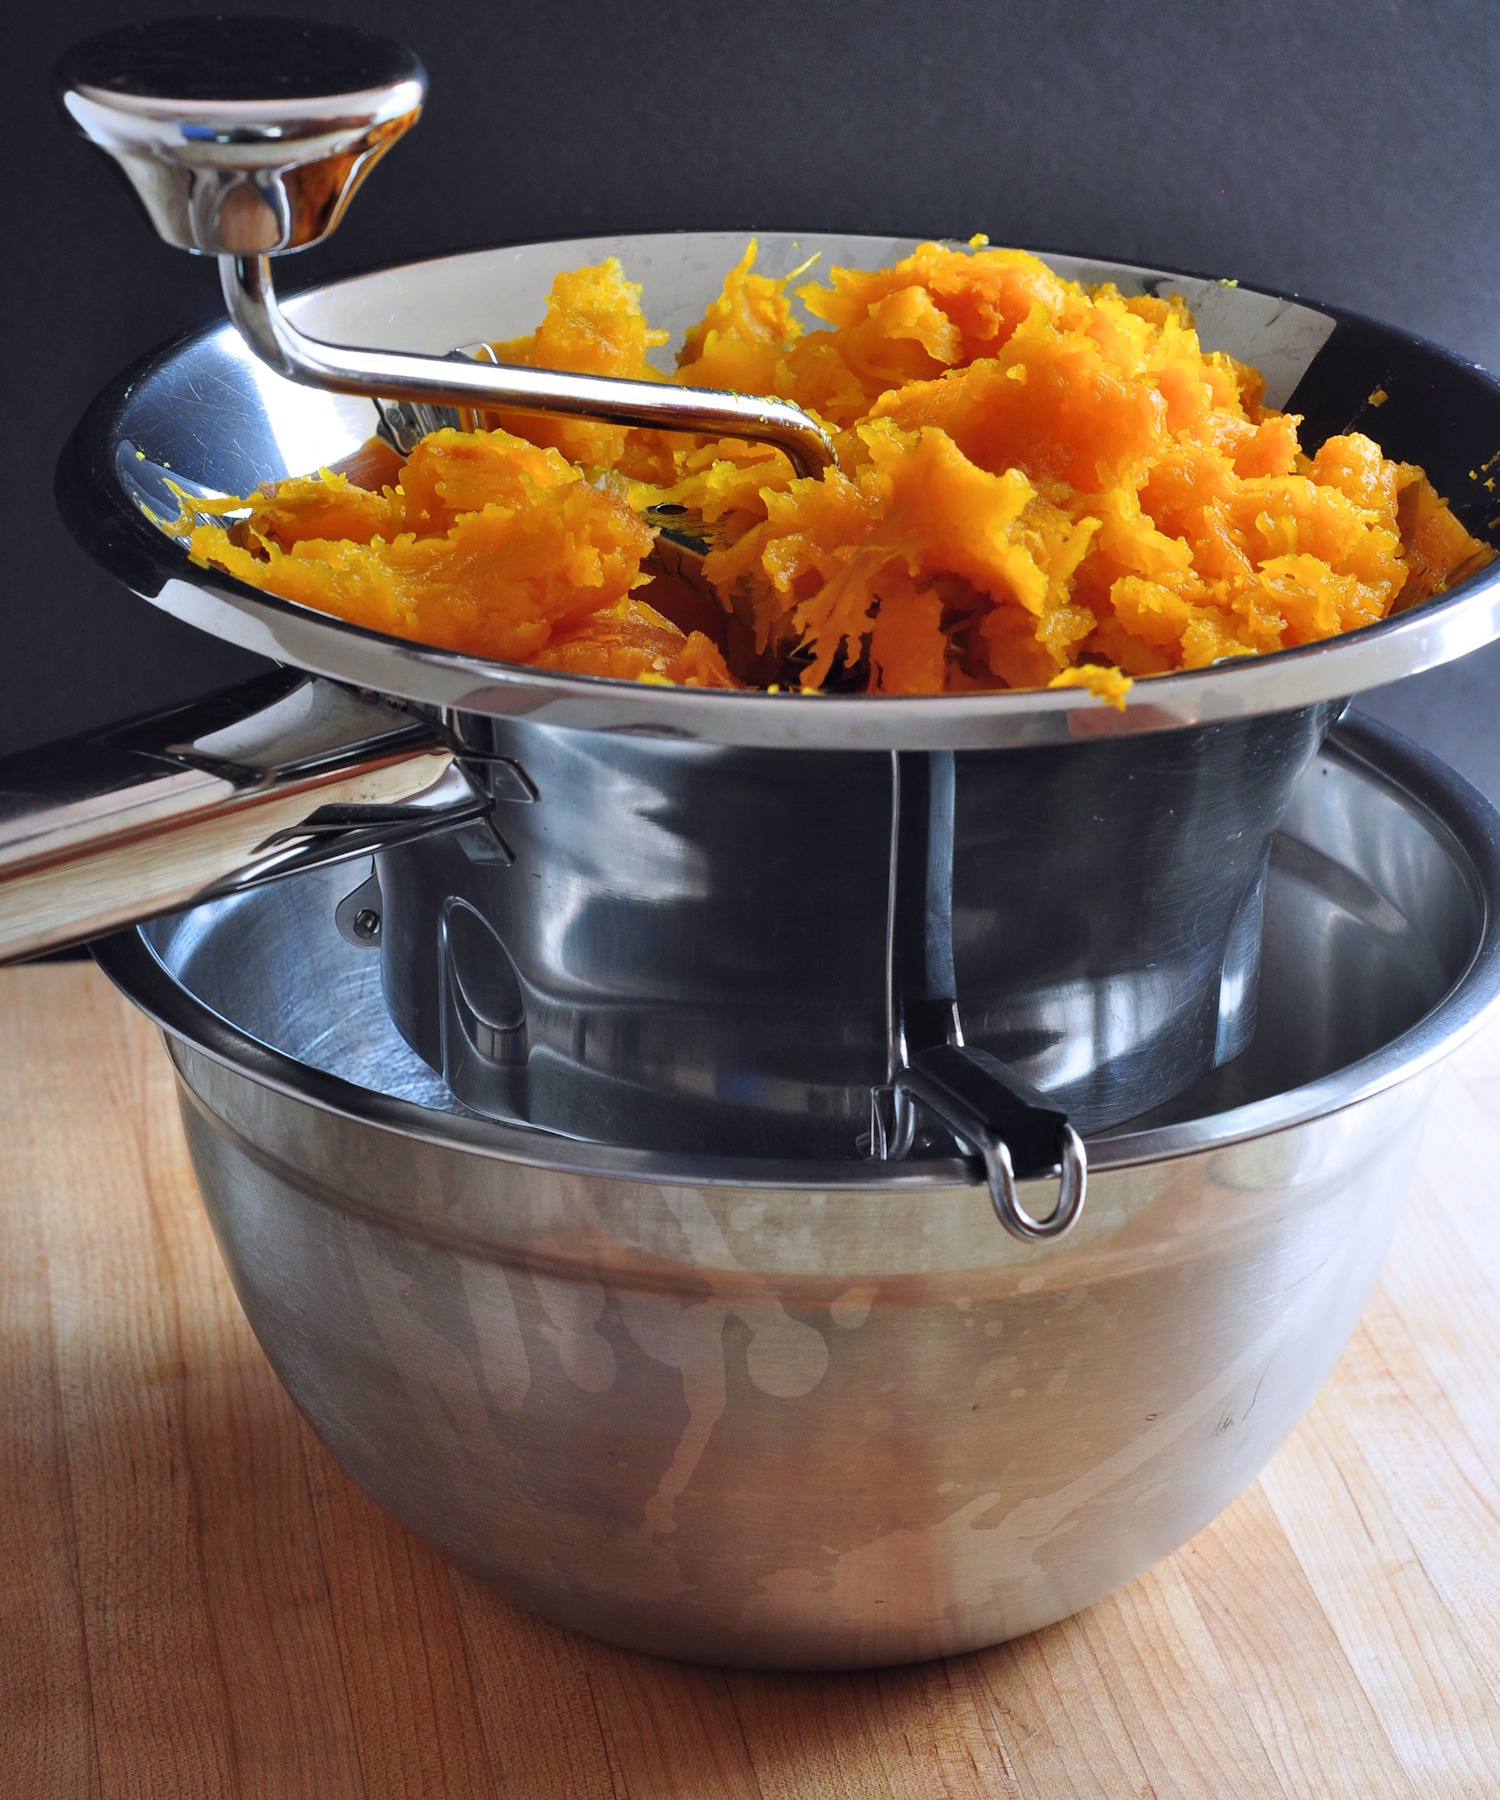
Use a food mill or Immersion blender
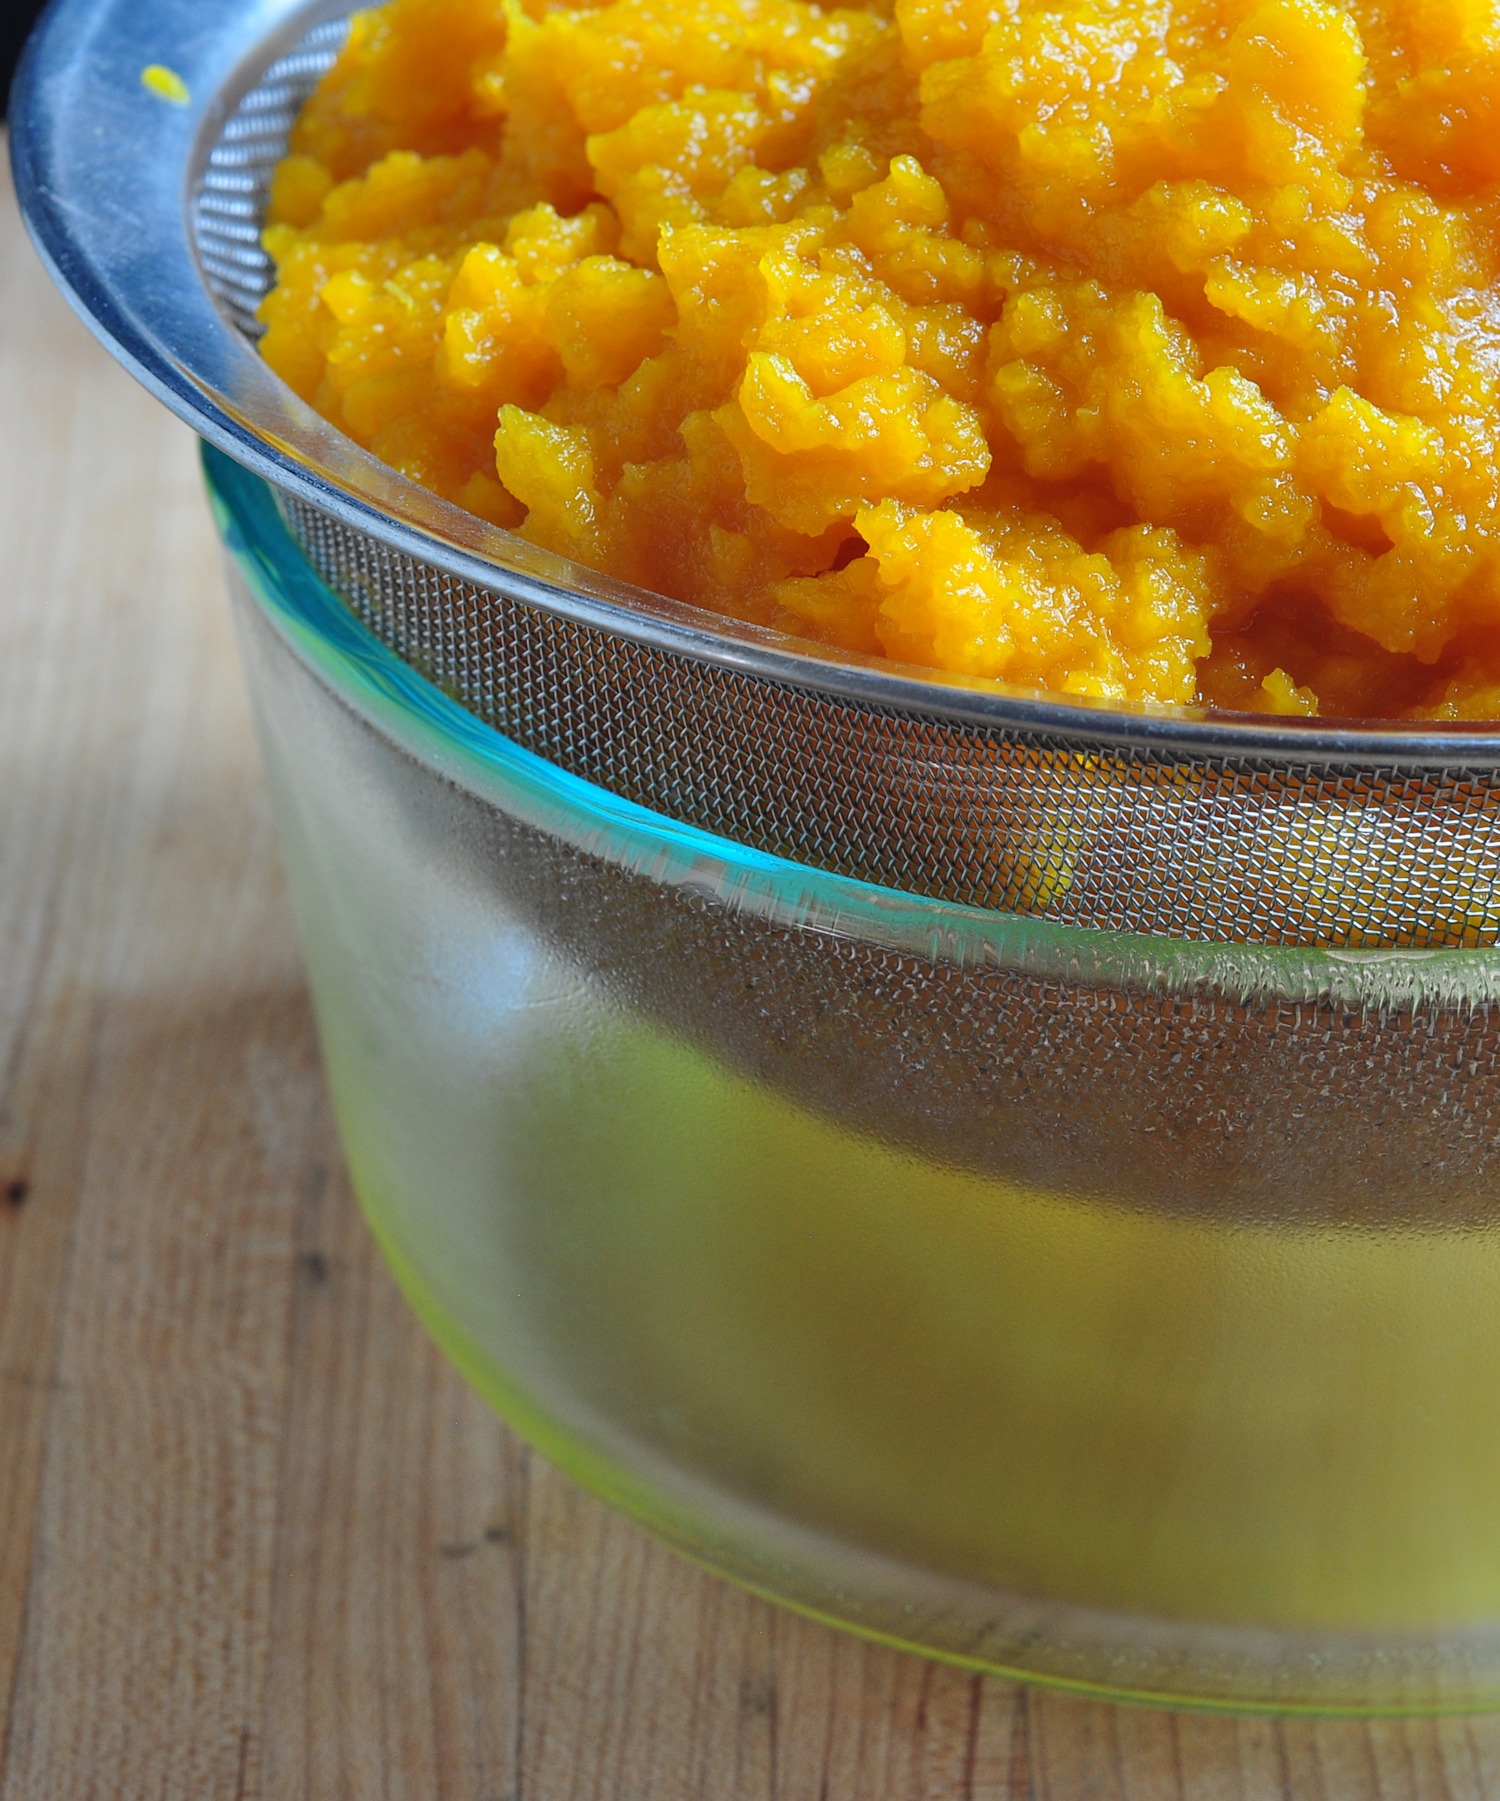
There are a couple of different ways to do this next part. You want to get all of the cooked pumpkin uniformly squished. [a highly technical kitchen term!] I used my food mill this time, but you can also use an immersion blender to do the job. You want to end up with a pretty smooth puree, but not liquified. I prefer the food mill for this, because it gets just the right texture.
Strain out the liquid
At this point, it doesn’t really look very much like what you might be used to, if you have bought canned pumpkin before. There is still a lot of liquid to get drained out of there. Put a large mesh strainer over a bowl that has a small enough circumference to keep the bottom of the strainer up off the bottom of the bowl. Then, the liquid has a place to collect.
Gravity can use some help
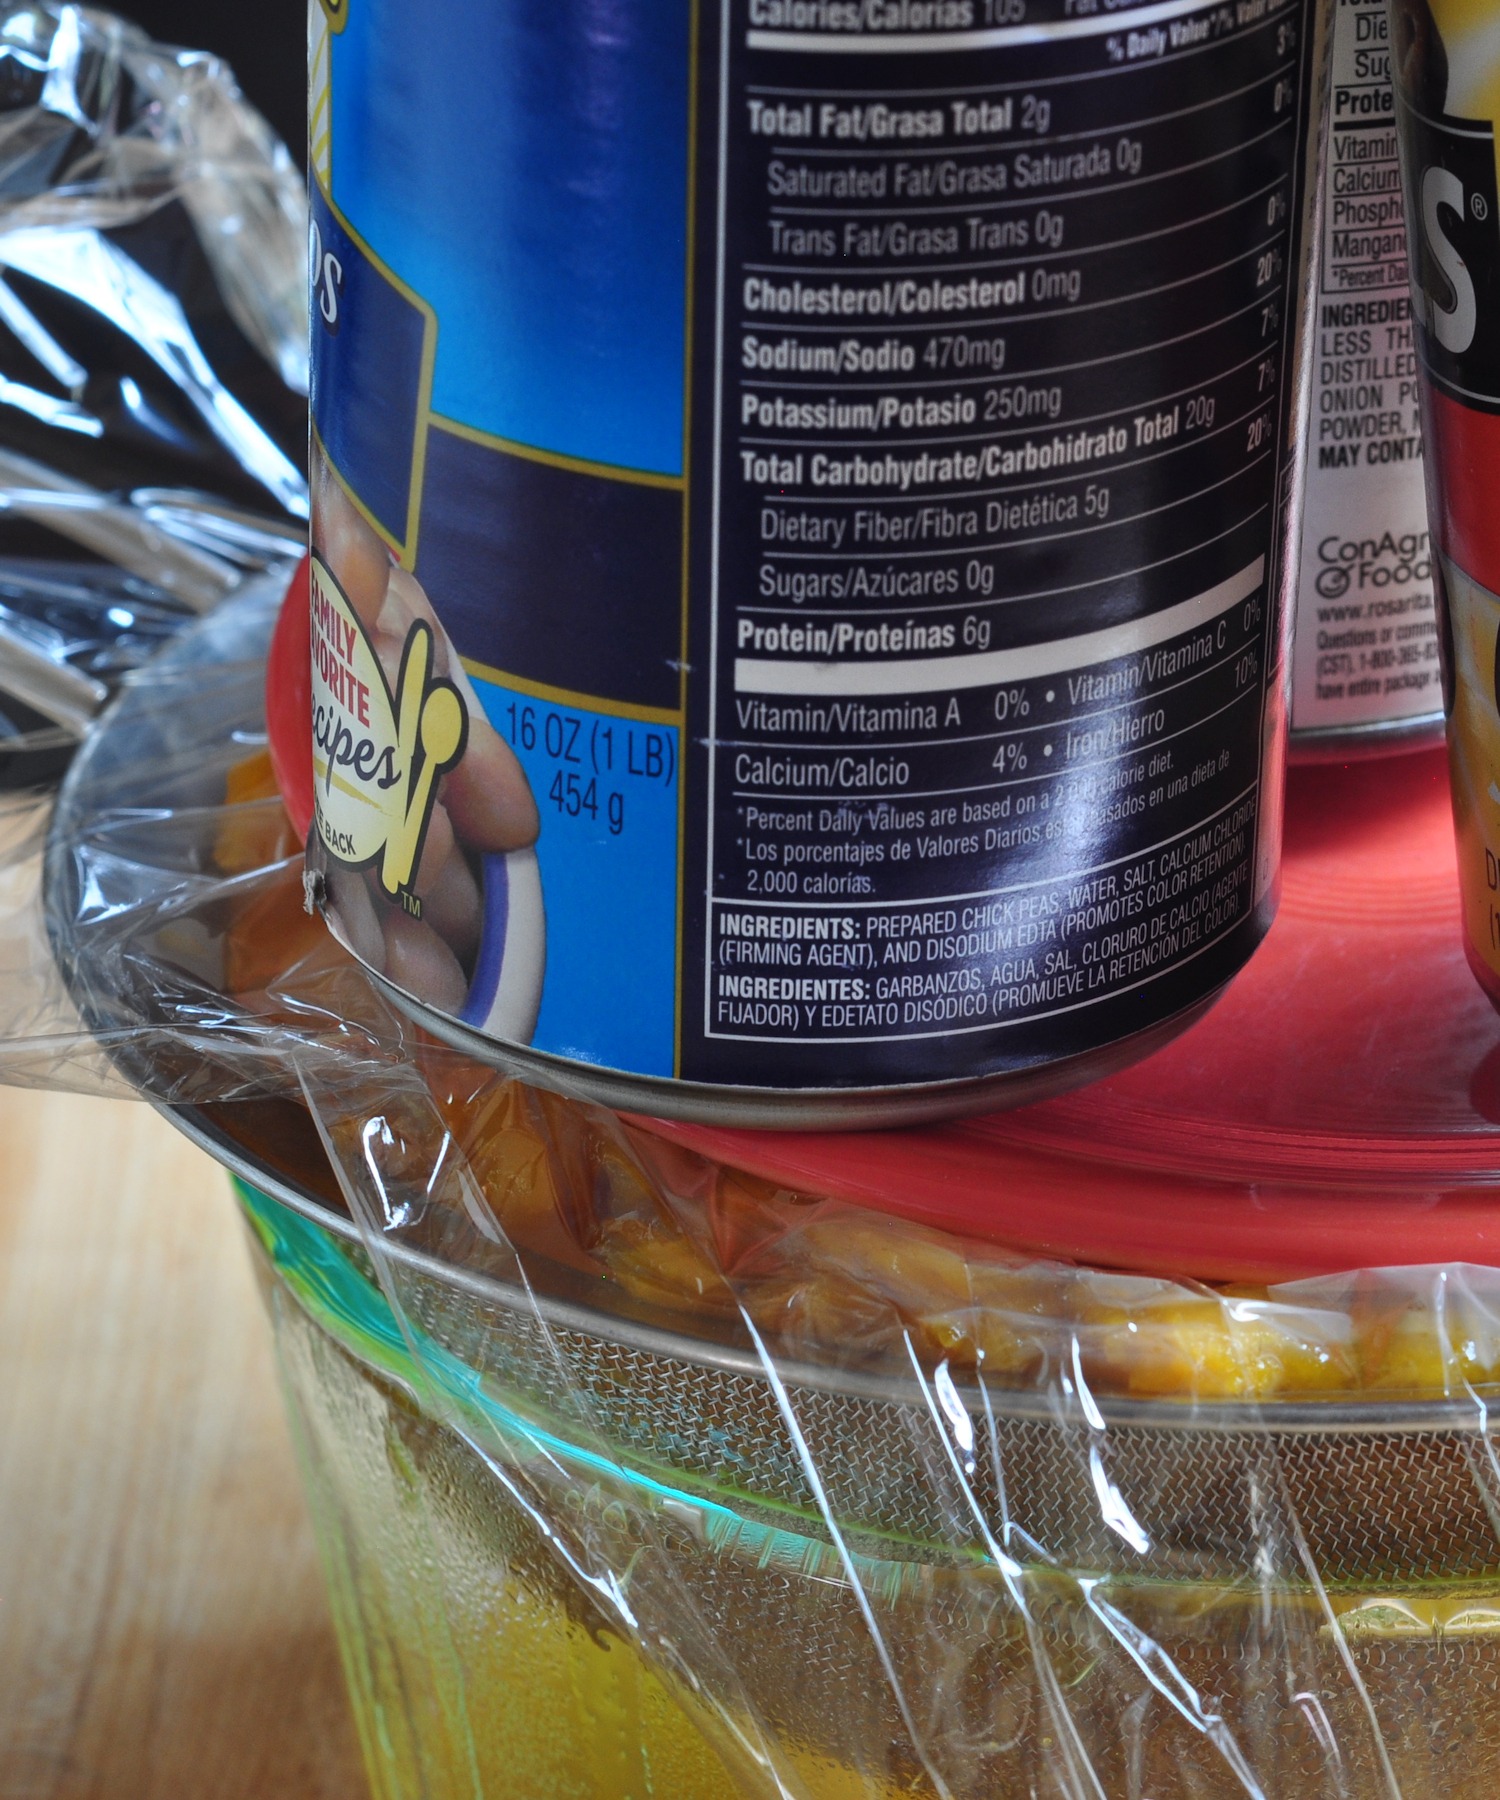
Put the pureed pumpkin in the strainer. You can just let gravity do the work for you, though it takes a while, and I am not patient enough for that. I lay a piece of plastic wrap over the pumpkin, place a small plate on top, and then weigh it down with some cans. This speeds things up quite a bit.
It is still going to take at least an hour. In fact, after an hour, I take off the weights, and stir it around some, then put the plastic wrap, plate, and cans back on top and leave it until it stops dripping completely. You really can’t get too much liquid out of there. I got about 2 cups from that one little pumpkin! This will be fine on the counter for a few hours, or, if you prefer, it can sit in the refrigerator overnight. The liquid strains out easiest at room temperature – just takes longer when it’s cold.
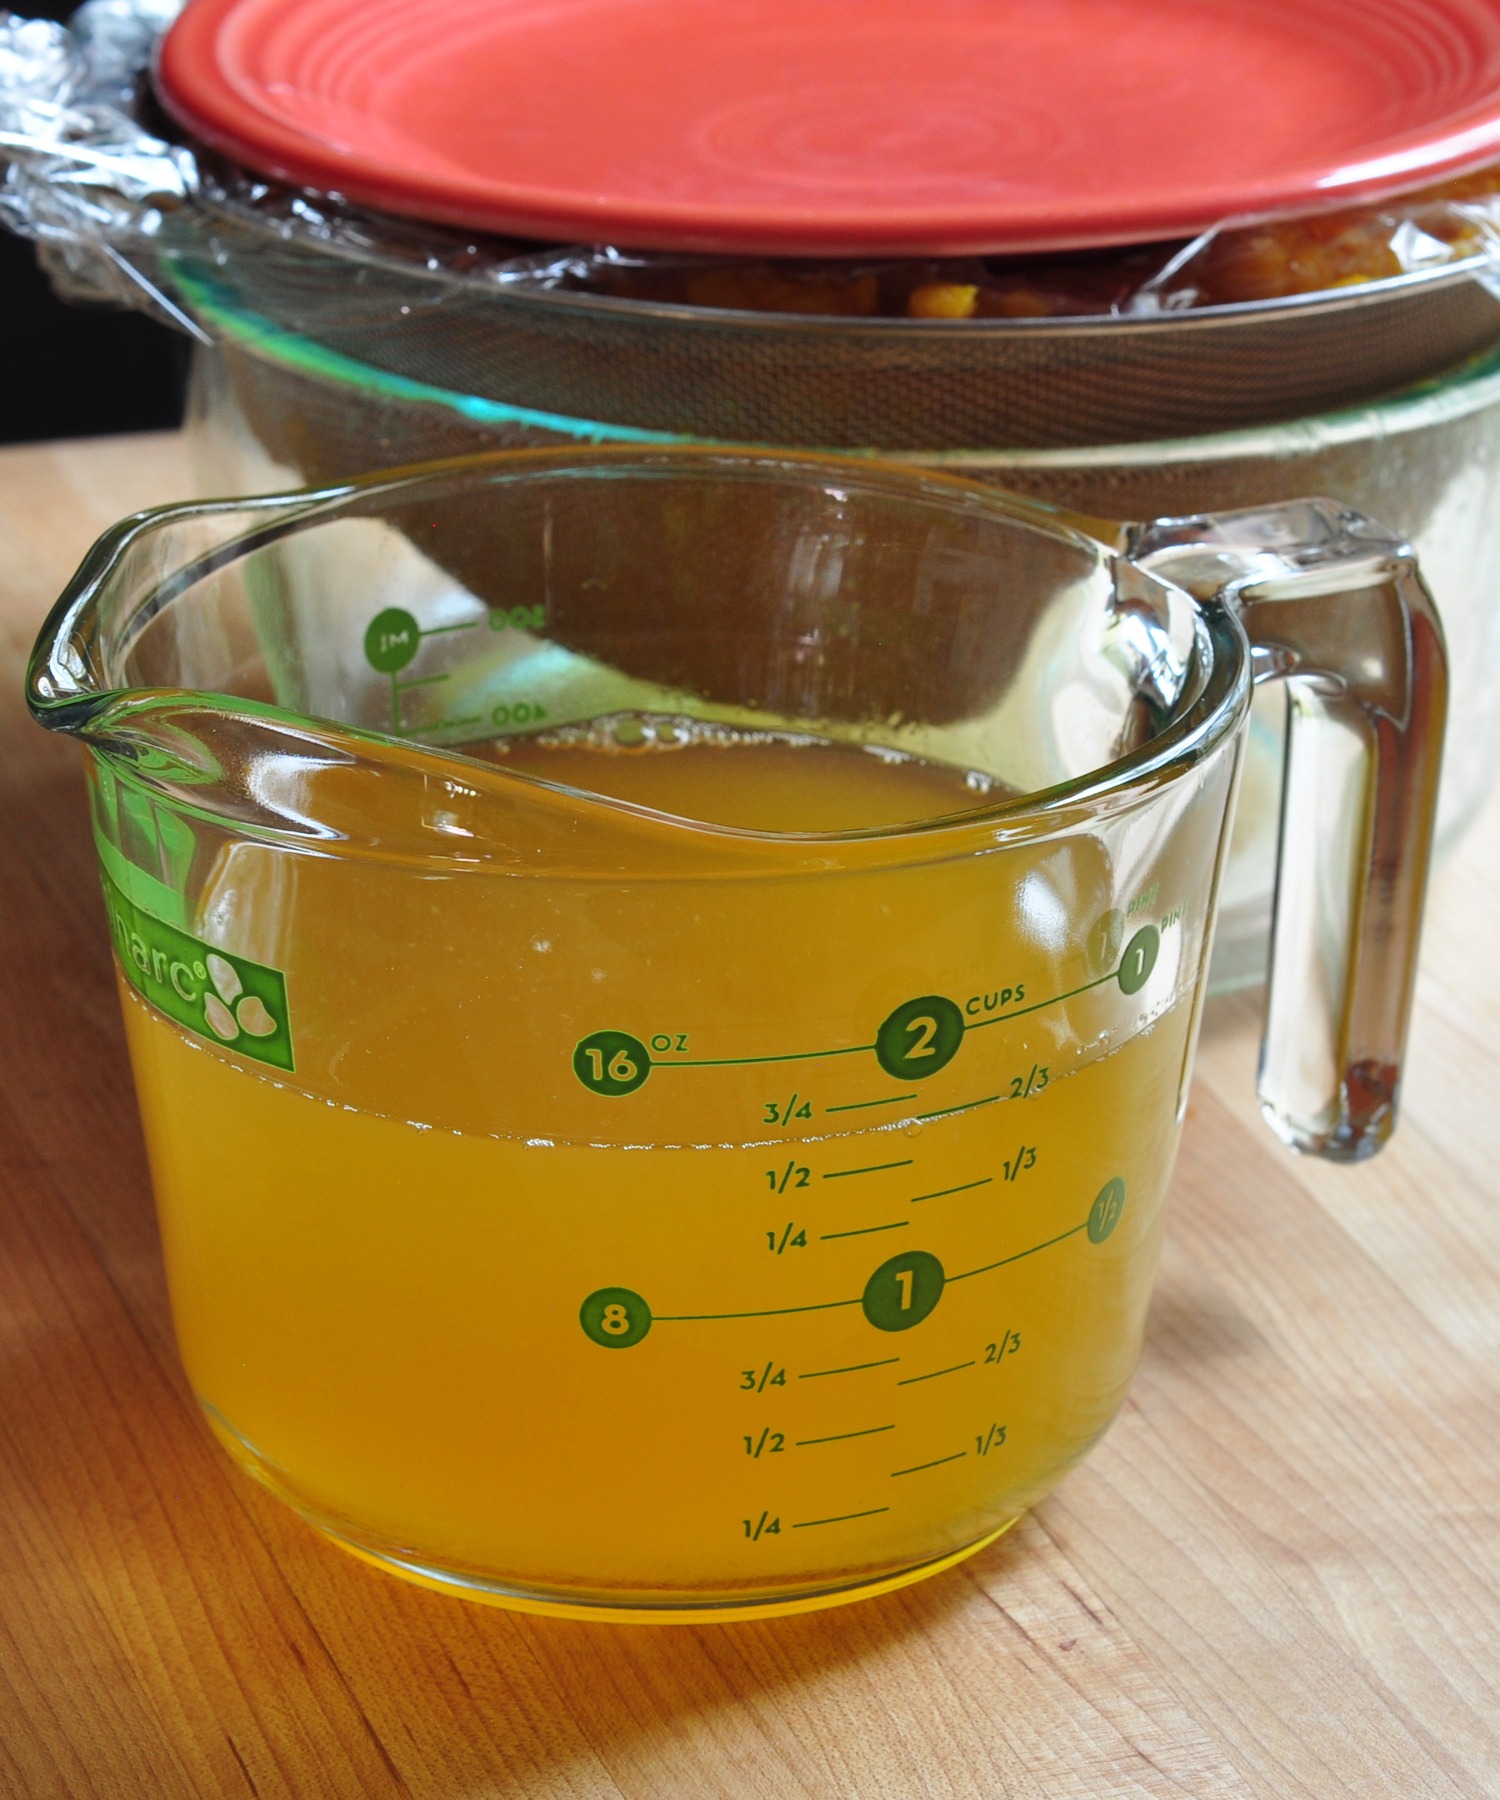
Don’t throw that liquid away – if you have chickens, they will love it, as will your dog probably. I use it in smoothies a lot, or save it to use in a soup – it is really good in any kind of veggie or bean soup. It can be frozen if you don’t need to use it right away.
How to cook a fresh pumpkin directions
How to Cook a Fresh Pumpkin
Equipment
Ingredients
- Fresh pie or sugar pumpkins
Instructions
- Wash the pumpkin[s] and dry completely, so that they aren't slippery when handling.
- Line a heavy baking sheet with parchment paper and set the oven at 400º. You can do as many pumpkins at a time as your oven will hold, and you have baking sheets for, but the photos just shows a single pumpkin]
- Knock off the stem, and cut the pumpkins in half, from top to bottom. Use a large sharp chef's knife for this - it will be much easier.
- Scoop out all of the seeds, and pull out whatever stringy membranes you can - no need to be super careful about it, but you do want all of the seeds. Put the seeds in a bowl of cold water right away, if you are going to save them, because it will make it a lot easier to get them clean.
- Lay the pumpkin halves, cut side down on the baking sheet. Parchment paper is by far the best way to keep them from sticking, but if you don't have any, oil the baking sheets.
- Roast the pumpkins for 45 minutes to an hour, until a sharp knife meets no resistance at all when poked into the side. [once you get past the skin of course]
- Flip the pumpkin halves cut side up to cool for awhile, until you can comfortably handle them.
- Scoop out all of the flesh, into a bowl big enough to hold it all.
- Puree the pumpkin with a food mill or immersion blender - you want it very smooth and uniform.
- Place a mesh strainer [a colander will not work, unless it is a fine metal mesh one] over a bowl, and put all of the puree in there to drain. You can weigh it down by placing plastic wrap over the puree, with a plate on top of that, and then some kind of heavy things on top of the plate - cans of beans or some such.
- Allow to drain for 1 to 2 hours, until no liquid is still dripping out.
- The pumpkin can be used right away or you can store the it in the refrigerator for 2 or 3 days, or freeze it to use later on in the year.
Notes
Ready to use right away or refrigerate or freeze for later
You can use this right away for pies, etc. Or freeze it, and then after thawing, you can use it just the way you would any canned pumpkin. [After thawing, I do usually put it back in a mesh strainer for a few minutes, because there is always a little more liquid, and if you leave it in, your pie or whatever might end up on the watery side.] I package it up in about 1-pound packages, in freezer bags, freezer containers, or saved yogurt containers [if using containers, press parchment paper, wax paper or plastic wrap right on the surface, to prevent freezer burn] – it will keep in the freezer for about a year.
About those pumpkin seeds…
With the exception of the skin and stems, you can use every part of the pumpkin. I mentioned above that I save the strained liquid for soups and smoothies. And you can roast the seeds, which a lot of people love to eat. I also mentioned above that it is a good idea to put the seeds in cold water as soon as you remove them.
When you’re ready to deal with them, swish them in the water vigorously, to remove as much of the pulp as you can.
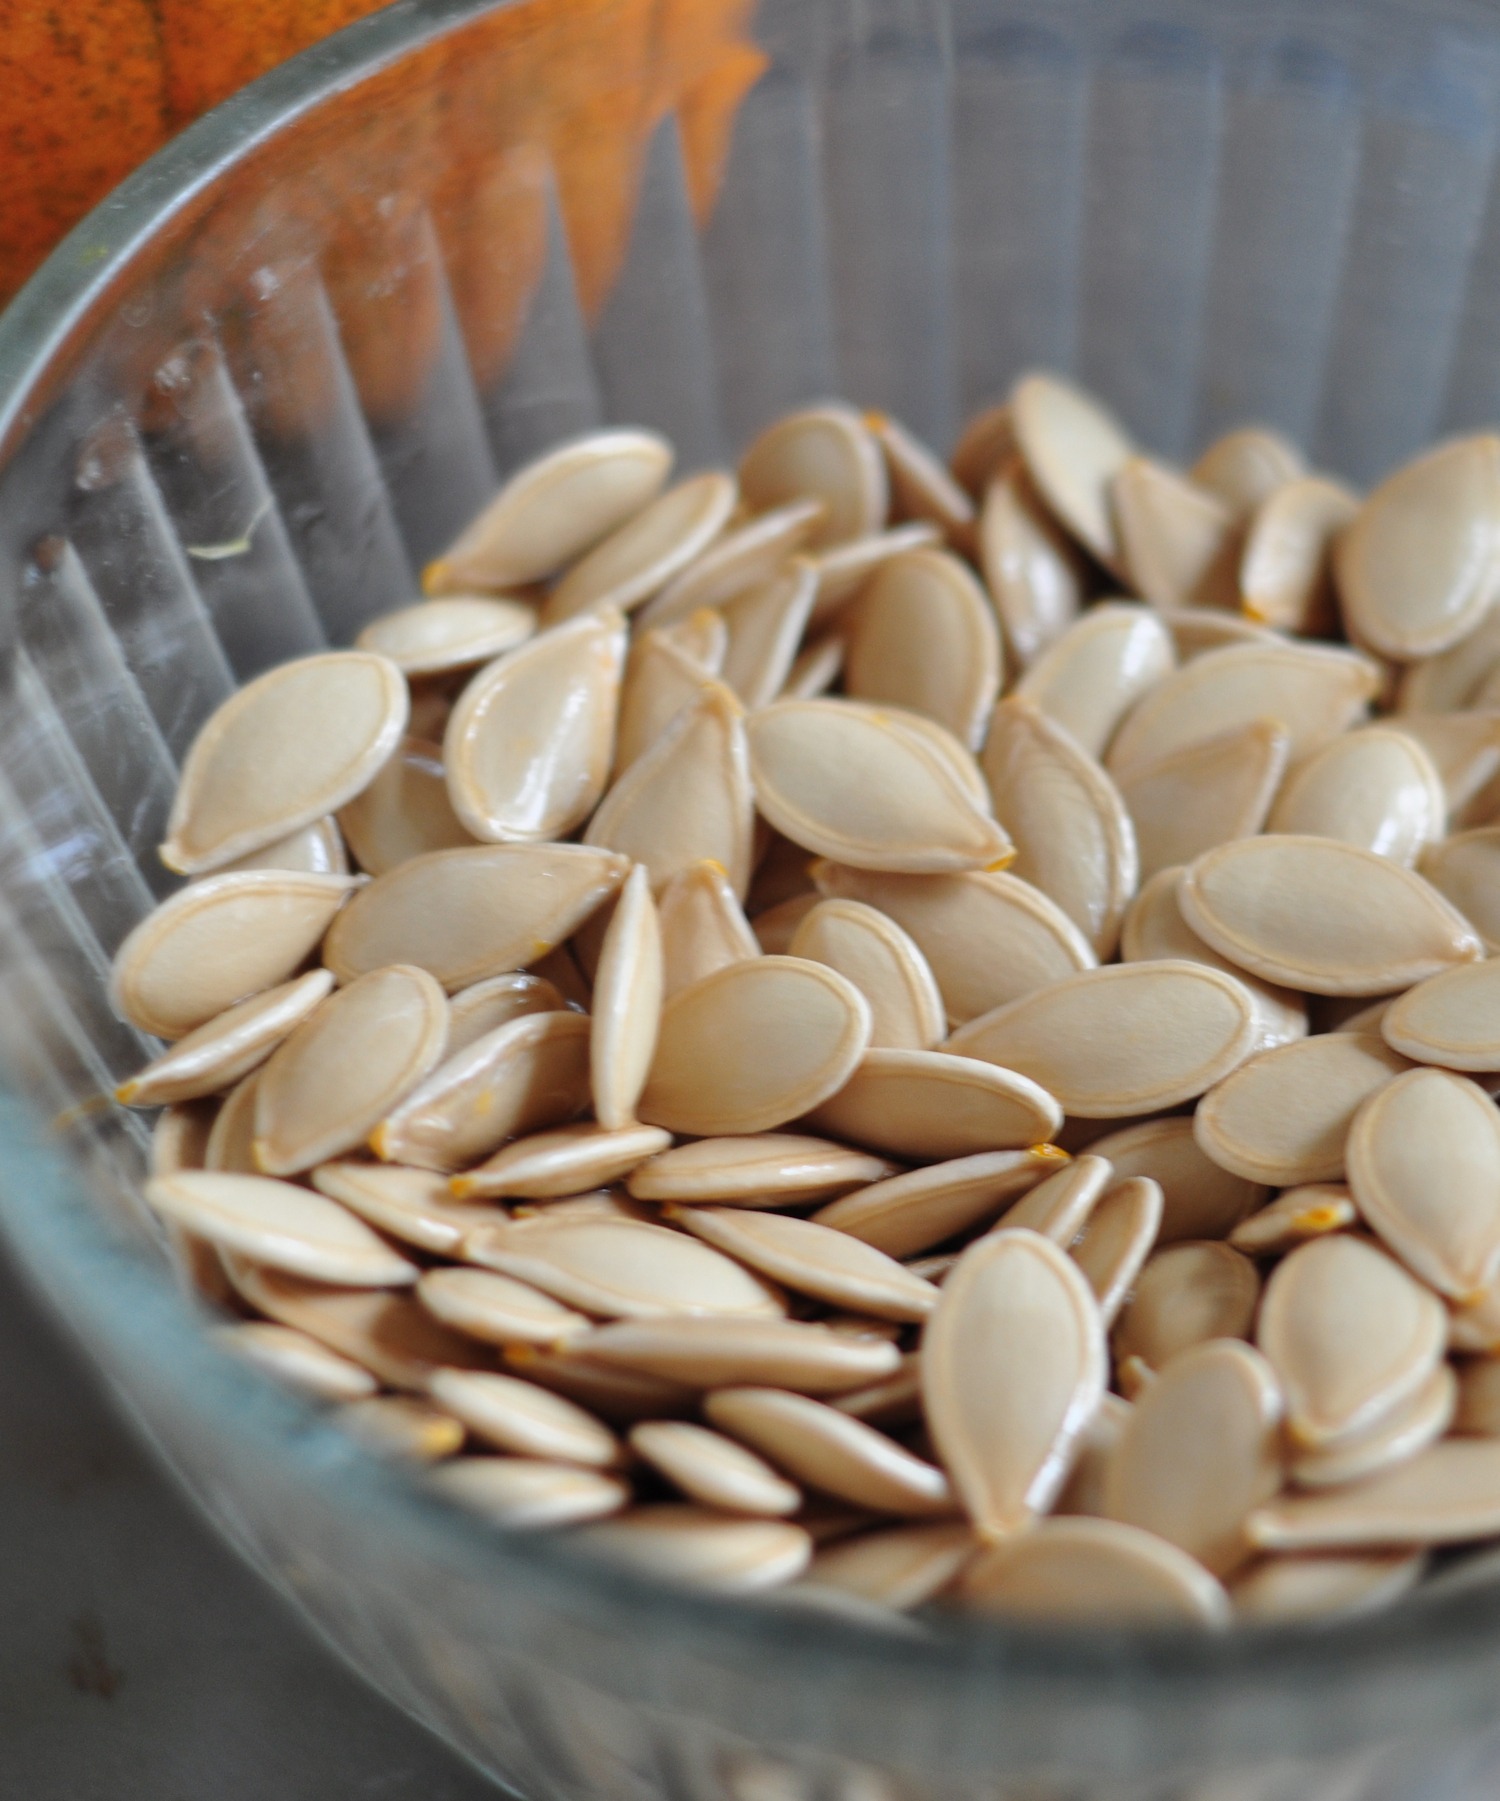
Place them in a saucepan, cover with about 2 cups of fresh water, and add a tablespoon of kosher salt. Bring to a simmer and stirring occasionally, cook for about 10 minutes. Drain them well in a strainer, shaking to remove excess moisture. Place the seeds in a single layer on a parchment lined baking sheet [see links in the recipe card]. Drizzle with avocado or olive oil, and stir to coat [you can do that in a bowl if you find it easier.]. Roast in 400°F oven. The timing is going to vary, depending on how big the seeds are. I check and stir them around about every 5 minutes or so. Large seeds can take up to about 20 minutes. We like them to be very lightly browned. Watch carefully, because they aren’t very good if they burn.
More recipes here on The Creekside Cook, using fresh pumpkin
Originally published in October 2014, and revised to add more tips several times, the most recent being September 2024
 Chili Roasted Butternut Squash
 Pumpkin Beer Bread
 Molasses Apple Cobbler
 My Favorite Thanksgiving Recipes
 The Best Turkey Gravy
 Southwest Cornbread Dressing
I usually reach for the can, but I’m going to do this and freeze lots for next year, thanks for the tutorial!
Quite a big difference in taste Sue – though I still use it from a can if I don’t have any fresh ones 😉
Ok to use a mixer to puree?
I do. And I’ve been doing pumpkins like this for years. However I’ve not ever saved the liquid. Well, I will now.
It is very useful stuff for sure! 🙂
Thanks for the post Donalyn…perfect timing…and I love the idea of saving the liquid for soups…
Have a wonderful day 🙂
Me too Julia – so much more flavor!
I KNEW that you would know this, Donalyn! Thanks so much. Now I can cook these pumpkins my aunt and uncle gave me without feeling like a total idiot! I love all of the options for using different equipment, and how practically nothing is wasted. Thanks again!
Glad you got in touch in the first place Aimee – come back to let me know how it worked for you!
This came out so well!! I made some pumpkin bread with part of it, and it’s amazing! Thank you again!
So glad that you had success with it Aimee 🙂
It’s funny but I have never seen canned pumpkin… though everyone eats pumpkin here! I only learnt it existed from US/Canadian blogs… I’m glad to see you encourage people to cook fresh produce. It’s always healthier than buying canned stuff! Great idea to share.
I know Sissi – we use pumpkin in completely different ways than most of the rest of the world.
Have you ever tried cooking one whole? I did it recently and like the results. The only difference is you push the whole thing through a tami to remove the seeds, fibers and skin. GREG
Very interesting Greg – I imagine the flavor is quite different that way. Thanks for the idea!
I cook mine while. I cut out a lid like when making a Jack-O-lantern, scrape out seeds and stringy pulp (use seeds to roast). When cleaned out I pierce the outside of pumpkin a few times around, place lid back on, place in oven upright with lid on and bake on a pan with 1″ lip lined with foil until tender when poked with fork or sharp knife. I did two large ones and they took 50-60 minutes in a 400 degree oven.
Should have said “I cook mine whole”.
WTF is a tami, Greg?
A tami is type of strainer with very fine mesh and it work for this, though it might take longer.
Never tried this before, but I do enjoy my pumpkin love 😀
Delicious!
Cheers
Choc Chip Uru
Me too CCU 🙂
Really nice explanation of how to do this! I am excited to try it with the pumpkins I just bought. thank you!
Glad that I could help, Rob.
I always make fresh pumpkin pie for our Thanksgiving dinner but I always use Butternut Pumpkin (squash) instead because they re smaller and easier to use. But with your instructions, maybe I’ll try the ‘real pumpkin’ next time!
I use them more or less interchangeably myself Fran – the flavor and texture are very similar.
i have never tried using butternut squash for punpkin pie! great idea! also plan to try using fresh pumpkin– my son wants to use the seeds to roast and i love the idea of using the liquid in soup! ty all for ideas
I love the idea of saving the liquid for other dishes, Donalyn. I can just imagine it in risotto or soups. Yummy!
Thanks Bonnie!
What a great recipe, Donalyn! Thank you for sharing… I’m so intimidated by the pumpkin, lol! But, you have now inspired me to make my own pumpkin instead of buying it in a can, thank you. I’m so pinning this for reference!
I found a “cheese” pumpkin this year and was told the meat from that is the BEST for baking with. I have yet to cook it down, per your instructions, because it is so pretty , so it will sit on my porch for a few more days before it gets cooked. I have the pie pumpkins too which are excellent.
Great tips for cooking pumpkin. I’ve done it, but now I’ve got the definitive guide. Thanks for stopping by our Happy Holidays Link Party – be sure to join us again this week (beginning on Saturday at 7 pm ET) and every week through the holidays.
Thank, Hon, Hadn’t done it for a while and I never used that trick of draining all the liquid. Now on to the baked Pumpkin doughnuts! The pie will come later.
Silly question….. Do you have to freeze the pumpkin or can you just refridgerate and if so how long is it good in the fridge? Also, how do you store the liquid you have leftover do you freeze that also? I saw you mentioned giving it to your animals…. how do you do that? Sorry for all the questions but I’m crazy for pumpkin and this is the first year I started cooking pumpkins and I want to get the most use out of it.
Hi Danielle – not silly at all! I would not refrigerate it for longer than a few days – the quality will definitely deteriorate after that.
I do also freeze the liquid – sometimes in ice cube trays, so that I can add a cube or two to rice while it’s cooking – up to pints or quarts for soups and such. I save containers from yogurt, sour cream etc to use for things like this. [I only reuse them once and then recycle – after that I don’t trust the plastic to not deteriorate and leach some noxious thing into our food]
As for the animals – the cat won’t touch it, but the dog likes it, so I give him a 1/4 cup or so at a time, either in his food, or just in a bowl. Not too much, cause he sleeps by the bed and I try to minimize stuff that will give him gas!
We also give it to the chickens – they will drink it from a shallow dish straight, or it can be mixed with their food. In the winter we like to give them a warm treat, so we would mix it with some laying mash and sit it on the woodstove until it’s warm.
I completely understand not wanting to waste any of it – we certainly don’t! The skin ends up in the compost for next years’ garden and everything else gets eaten by someone or something around here.
Instead of straining the pumpkin that way can use a cheese cloth to strain it.
I am not an expert
but I seen online no, it doesnt work as well
I cook mine the same way, but long enough that the pumpkin collapses. I then drain off the liquid and when it is cool enough to handle, I peel off the skin leaving all the pulp to be puréed and frozen for pies,cakes and muffins
this looks easy i am trying it for the first time.. we shall see
thank you
This is my first time to use fresh for my pie, draining now, I would have never known that much juice was in them! Fingers crossed! Happy Turkey Day everyone!
Just completed. Extremely easy . Wife of 50 years has just concripted me for the thanksgiving day desert
What can you substitute for parchment paper ?
My mom used to take a Teflon frying pan and slowly cook the pumpkin until all the liquid was cooked out. But that is because she never use the liquid for anything else.
I made this recipe and it worked out great. But when I froze the left over fresh pumpkin the pies didn’t turn out . I thawed it and did the same to it as I did the fresh. What did I do wrong?
Lana – it does note in the recipe that when freezing the pumpkin, it may release more liquid as it thaws. I always strain again if I have frozen the puree.
I just follow your direction for making fresh pumpkin. (Last year I tried it, but did not know that I needed to drain the liquid out.) I did not have a big enough mesh strainer, so I improvised by layering two colanders with paper towels and spooned the purée in them. I placed the colanders on top of introverted bowls sitting inside larger bowls. The purée has been draining for about three hours and I am amazed by the amount of liquid that has drained out so far, and is still slowly dripping out. Thank you so much. This year’s pumpkin results will be much better—I can already tell.
I just bought a deluxe food mill. What size disc should I use for the pumpkin? I have large medium and small holes
Mindi, I would use the smaller size holes I think.
my grandmothers sister at our reunions use to bring a bowl of fried pumpkin. I LOVE that bowl of once a year goodness and am going to try to do it. I’m glad I found your site and now I know if the pumpkins I bot are ripe. I also am glad you are going to tell us how to cook the seeds. Can’t wait!
Thanks again I’m doing this
I have tried your ideas here, and the puree came out very well and made perfect pumpkin bread – thanks!
Great idea! It worked prefectly!
Donalyn, this is really a great recipe. I will make this at the next chance i get.
That recipe looks so yummy! I’ll have to try that one. Thanks for sharing.
I’m waiting to hear about how to get those pumpkin seeds cleaned off for roasting!
All the way from the United Kingdom, I have never seen a can of pumpkin…but a massive thank you for sharing, I have never attempted to cook anything with pumpkin and neither has anyone I know, we use them as decorations here for Halloween… I was interested to find out what I could make as it seems like a waste! I found loads of recipes from the United States to try this week and now I know how to cook 1 I can’t wait!
Thank you 🙂
Just picked up a pie pumpkin from the farmers market in the Niagara region in Ontario and found your recipe for preparing fresh pumpkin. Our Thanksgiving is next weekend (October) here in Canada. Never knew about straining it so I will definitely do that. I am so excited to do this for my pumpkin desserts. Thank you for your excellent instructions.
I am going to give this a try. My sons both help a friend who owns a pumpkin patch. After Halloween, they all mostly go to a compost.
I asked him to bring me home a few to cook.
I just did this with a pretty large pumpkin that I had bought for Halloween. The kids were supposed to paint it but kept putting it off. I am amazed at the amount of purée I got from one pumpkin. I also have already collected a large peanut butter jar of liquid. My dogs and chickens are each getting some and some will be used for soups this winter. My 6 year old is already eating a huge bowl of roasted seeds. I will be making 4 loaves of pumpkin pecan bread today and freezing enough purée to make lots more this holiday season. I shocked how far this $3.00 pumpkin is going. I love pumpkin but never knew how to cook it before. I am also setting some aside for my nephew to use for baby food for his little one. Thank you so much for sharing!
Daphne – that is very good to hear – so glad it all worked so well for you! ♥
So if I want to use soon what spices would zi add to the puréed pumpkin? I like to make breads or pies
Annabell – I would wait to see what it needed for whatever recipe I am making – using warm spices, like cinnamon, ginger, allspice, etc.
After reading all the comments and what you have set up in the directions Donalyn Ketchum, I am going for it, I’m going to do it, pat me on the back, tell me I am the man, LOL. But my one question is this. Alongside scraping out the seeds and the loose stringy stuff can you use the loose stringy stuff for anything?
Ronald – that is the one part I can’t think of a use for. We give it to the chickens! 😉
Definitely going to try this Thank you Is there a link to toasting the seeds?
Thanks Donalyn for sharing the recipe and instructions. I have been trying to grow vegetables for a few years and still learning the process. Pumpkin is one I have struggled with. His year I had a little better success and wanted to try making my own pumpkin pie and or bread. I’m definitely looking forward to using your recipe.
I just now finished making my pumpkin purée. It was easy to do. Once I cut them in half, cord the seeds and stringy stuff, I baked, cooled and made my purée in batches, I froze batches of 12oz each in freezer bags. I’ve taken the seeds and have them soaking in salt and spices over night. Once soaked, I’ll drain and roast them! My juice I’m saving and will grab some ice cube trays from Walmart tomorrow, fill and freeze those to add to smoothies or soups/stew. Such an easy recipe to follow! Thank you for sharing!
I cut the flesh from pumpkin and put into a greased pot add 1/2 Cup water and cook on stove, strain after and store in freezer. Or season w sugar , cinnamon and make Empanadas and bake. So delicious!!
Pumpkin Empanadas sound really good Lettie!
Worked very well For my pumpkin pies
Perfect – thanks for letting me know!
Love fresh pumpkin pies.
You made this sound easy and it was!
I’m so glad to hear that Nisha!
I love how very easy this was to do. Thanks!
Glad to hear it Vera ♥
Found this method on Pinterest last fall and I am so glad that I gave it a try. Super easy and the best fresh pumpkin I have ever cooked.
My daughter asked for 1 small pumpkin to decorate. Well it just sat. So here it is a week before the holidays and I ran across the recipe after looking up How to, I baked the small pumpkin on 400 for 45 minutes and used an ice cream scoop to scoop out the cooked pumpkin. It worked beautifully. I put the pumpkin it a Magic Bullet to puree it. It turned out thick and really nice. I could use it for Pumpkin Pie. I am going to feed some to my dogs at dinner to see how they like it. But it turned out Perfect!
Can the pumpkin purée be canned? If so how?
I believe many people do can pumpkin puree, but I always freeze it. I don’t have instructions on that, but you can probably find it on YouTube.