This post may contain affiliate links. Please read my disclosure policy.
The Basics Series – Homemade Apple Sauce
Homemade Apple Sauce is one of the first things I remember helping with when I was a kid. Both my Mom and grandmother made applesauce. Often they did it together, and, as the kids it was often our job to squish the apples through the old-fashioned Chinois with the wooden pestle. 
I don’t know what has become of the chinois, but I still have Grandma’s pestle. It’s handy for all sorts of percussive tasks in the kitchen. Because of that, I admit it is a bit the worse for wear.
Making Apple Sauce now, the aroma takes me back to those kitchens from childhood, where the best part was sneaking a taste or two when I thought no one was looking. And the satisfying feeling when you see that golden brown goodness ooze down into the waiting bowl.
What equipment do I need?
The Chinois is pretty labor-intensive, though quite efficient for its intended tasks. Now, I use a food mill to make my apple sauce. Still people-powered, but it is quite a lot faster and requires less effort than the method I remember.
The process still smells exactly the same though – the whole house fills with the aroma of simmering apples and spices, with an undercurrent of brisk fall air and the drying leaves outdoors. It smelled like that for days, as a family of seven will go through quite a lot of applesauce in a year. We use a good deal less these days, but I still like to have plenty on hand for breakfast, visits from the grandkids, and baking stuff like Apple Sauce Quick Bread or maybe even Apple Sauce Whoopie Pies.
There are lots of food mills, but unfortunately, my favorite MUI doesn’t seem to be available anymore. See the recipe below for some suggestions, and always make sure you’re buying a stainless steel one. You do still see cast aluminum food mills, but considering that acidic foods are often run through them, aluminum isn’t such a great idea.
Apple Sauce or Applesauce?
Either is correct, but I always think of it as two words. Most sauces are described using two words, like tomato sauce or chocolate sauce. Apparently, here in the States, the single word is used more often – applesauce. But, not by me, obviously. ☺ I prefer two words: Apple Sauce.
On to the sauce, itself. There are tons of recipes for Homemade Apple Sauce made in crockpots or the oven. Usually for these, you peel and core the apples, and if you don’t think it’s worth investing in a food mill, then that is the way you may prefer to go. I’d rather not go to the bother of peeling and coring, and I prefer the flavor you get with peels left on. The food mill removes the peels and cores, but they do impart some color and flavor, not to mention plenty of nutrients, before they go.
Less trouble, and a better result – definitely worth a try, if you’ve been doing it another way.

What kind of apples make the best apple sauce?
As for what kind of apples work best, the answer is – the apples you have. I often buy a lot of apples when they’re cheap. If I find them starting to get soft on me, before we get them eaten up, then I often turn the older ones into sauce. Other times, I buy an assortment of different kinds, specifically for sauce making. Mixing together the tart and sweet, the crisp and the softer texture for a more interesting flavor. But, even old-and-just-barely-edible Macintoshes will still make a tasty sauce. I made this batch with an assortment, but mostly slightly soft Cortland apples. Cortlands, when first picked are great for baking and eating, both. They aren’t great keepers though, which is how I ended up with some that became over-ripe.
If you’re going to buy apples specifically for making Homemade Apple Sauce, an assortment is a good idea. You will end up with a fuller flavor because each kind of apple will bring along its own unique characteristics.
Homemade Apple Sauce
Equipment
Ingredients
- 12 to 14 pounds Apples
- 1/4 cup Water or apple juice
- Sweetener [optional] to taste
- ground cinnamon, ginger, nutmeg, cloves, allspice Spices aren't required, but add what you like.
Instructions
- Wash the apples well, and remove the stems.
- Cut each apple into quarters or eights - nice big chunks. No need to peel or core. If you are in a big hurry, smaller chunks will cook down more quickly, but it takes more time to cut them up, so you end up about the same.
- Put the cut apples - peels, cores and all into the big pot, along with the water or juice, cover the pot, and turn the heat on medium low.
- You will start to hear a little action in the bottom pot fairly soon. It's important to stay close and keep the apples stirred up so they don't stick as they are getting going. Once they cook a bit, they will begin to release some juice which will keep them from sticking so easily, but at first, you have to tend them more closely.
- Once the apples are getting juicy, you can remove the lid so that the sauce ends up thicker - this allows the excess moisture to evaporate.
- Continue to cook, stirring frequently,until the apples are completely broken down into something that is going to look very much like finished apple sauce, though with skins and stuff in it still. This can take anywhere from 15 minutes to 30 or 45 minutes, or as much as an hour. It depends on what kind of apples you used and how fresh and firm they were. The fresher and harder the apples, the longer it will take.*
- Once they are cooked down enough, I like to let them cool a few minutes, because getting hot apples on you is kind of like napalm, and this gets a little splashy if you aren't careful.
- Set the food mill over a bowl, and run the apple mush through it a few cups at a time. Turn the crank backwards every 10 cranks or so to clear the screen, and also scrape down the sides if needed.
- Add more apples to the food mill as needed, and keep cranking.
- Every so often, you need to empty the seeds and skins from the food mill. Lift the food mill away from the bowl and carefully scrape the applesauce on the bottom into your bowl. Then empty the mill into a compost pail or what have you.
- Continue processing until all of the apples are run through the mill.
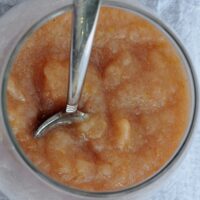
- Now, you have Homemade Apple Sauce! Taste it to see if you think it needs to be sweeter - you can sweeten it with sugar, maple syrup, honey etc., but do it very gradually to make sure you don't get it too sweet.
- You can add what ever spices you like now as well, again adding small amounts and tasting to get it where you want it.
- I usually don't don't sweeten mine, because we like it kind of tart, and if you are going to use for baking, it's probably best not to sweeten it. I usually wait until I'm using it to add spices too, because what I put in will depend on how I'm using it. If you know you are just going to eat it and you want it taste a certain way, then go ahead and sweeten and spice it to your taste.
- You can keep in the refrigerator for about a week, or freeze it in containers or ziplock bags.
- For canning instructions, check the process out via Google, or see under equipment, above for a good book to help you along.
Notes
Toast dipped in apple sauce is still a favorite breakfast for us – a childhood combo of which we will never get tired, I’m sure. Apple sauce is also wonderful on hot cereal or yogurt. And it’s a very common accompaniment to dishes containing pork.

On the other hand, a plain bowl of Homemade Apple Sauce is pretty darned good too.

 Double Apple Bourbon Cake
 Apple Crisp Bars
 Poached Apples with Caramel & Greek Yogurt
 Pasta with Fresh Tomatoes and Basil
 Refrigerator Pickled Hot Peppers
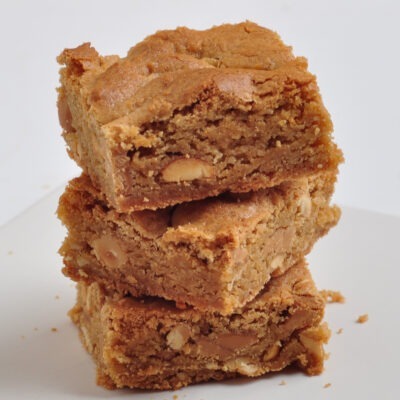 Triple Threat Peanut Butter Blondies
 Tomato Jalapeno Jam
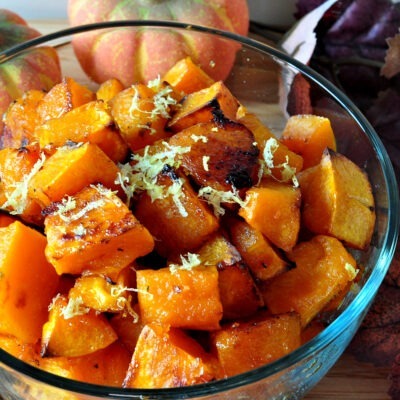 Honey Lemon Winter Squash
 Fruit and Nut Oat Bars
 Jalapeno Garlic Dill Pickles
i had a bag of apple about to go bad and ran across this recipe. it worked perfectly and the apple sauce is so good! thanx!
Thanks Leticia – very good to hear from you!