This post may contain affiliate links. Please read my disclosure policy.
I’ve mentioned before that my years working at a greenhouse got me all addicted to gardening and planting a bunch of new stuff every year. Expensive – real expensive. So, I’m trying to stay out of plant nurseries this spring by starting my own seeds. I had tried it on and off over the years, never with much success. My plants were always weak and leggy and often dwindled away long before I could get them in the garden. I’m still no expert, but over the last couple of years, I have figured out the main things you must have to start healthy plants.
It is a bit early to actually start seeds for the garden, but it’s not too early to begin gathering what you need – so the photos in this post are from a previous year. If you are having trouble finding anything, leave me a question in the comments, and I will see what I can do to help you find it.
So – seeds, of course. I’m a seed ho this year – I bought them all over, in stores and online and just when I think I have all I need, something else catches my eye [sorrel, I’m looking at you!]. And, I’ll be hanging on to them, because though the packages are dated, if you keep them dry and in a place that is not hot or humid, they will keep for a long time. The germination rate might go down a little, but honestly, I haven’t seen that happen with ours. You might wonder why you don’t see a bunch of heirloom type varieties, but the fact is we don’t use them that much. We’ve had a terrible problem with both early and late blight in our area, and heirloom varieties tend to be more susceptible to those kinds of problems. Not everyone agrees, but that has been our experience and as much as we depend on our garden to feed ourselves, we’ll stick to that hybrid vigor.
You can plant them in anything you like, so long as it will hold dirt and that you can poke a few holes in the bottom for drainage. I save my trays and cell packs from year to year, as well as all the little pots from when I buy already started plants. Just make sure you clean them really well before re-using – a final rinse with a tablespoon of bleach per gallon of water is a good idea. Next, you need some good seed starting mix. Regular potting soil is kind of heavy and often has bigger particles that can make it hard for little seedlings to get out into the light. You aren’t going to use a whole lot of it, so even though it’s a little more expensive than potting soil, it’s worth it. I watch for on it on sale and stock up. Wet the soil before you plant any seeds. By wet, I mean completely saturated – as much water as it will hold. In the greenhouse, we usually did this the day before, and then again that morning, but commercial mix is dryer than what you can buy at the local garden center, so you can probably do it right before. Stick your finger down under the top layer of soil to make sure it is wet all the way through, and if it isn’t, water it again. My friend Kathy soaks her soil in a 5 gallon pail, and then packs it in trays.
 I put 3 seeds per cell when I am doing things like tomatoes and peppers that will get transplanted into bigger pots before they get to the garden anyway. That way, I am going to get 18 tomato plants from each six-pack. Don’t worry – they aren’t all for us, because we share with a few other people. Good thing too, since I planted 6 different kinds of tomatoes. Just lay them on top of the dirt. You can just put in one or two if you prefer, but if your seeds are more than a year or two old, an extra seed in each cell is not a bad idea.
 hen I use a chopstick to very gently poke each seed down into the dirt, just a bit, and then pat it gently with my finger to smooth it out. Unless you are planting something that says it needs to be planted deeply to germinate, like parsley for instance, you don’t want it to have to work very hard to get to light.
 Make sure you mark everything – the kind of seed and when you planted it. I don’t plant every thing at the same time either – I got some early tomatoes going about two weeks before I did these, and I’ll wait to see how these all come up to decide if I need to do more. And you don’t have to start a whole bunch if you are first getting started – just a couple plants will give you an idea if it’s worth it and reasonable for your situation. I get a lot of satisfaction from looking at a huge, loaded-with-tomatoes plant in August, and remembering when it was just a teeny shoot in the living room.
 Keeping things as moist as they need to be, without drowning your seeds or teeny plants can be difficult. This is an fantastic find that I got at the dollar store a few years ago – for 2 bucks! If I had know they are usually about 5 times that much, I’d have picked up more of them, because they are SO handy. I always use a spray bottle to water seeds, but it can be tough on your hands after awhile – this, you just pump up and then push a button to spray. So – water with a spray bottle and don’t let the surface dry out. After the plants a little bigger and stronger, you can go to a watering can, and you can let them get a bit drier. A bit of adversity will make your plants stronger – just like people, right?
 And you need light. This was the biggest thing I always struggled with. Even with a bright south-facing window. my plants were always leggy. You need light to be closecloseclose to the plants. You don’t want them to have to work to get to the light, because the only way they can do that is to streeeeetch themselves out to reach it. Leggy! I said a little adversity is good, but I wan’t talking about light. Once they are up nicely, you can let them get a little dry and they can be a teensy bit cool, but don’t make them have to look for light. I like these lights, because I can raise them so easily and just keep them an inch or two right above the plants. I got mine at Amazon – this is a link to the one I have: Hydrofarm JSV4 4-Foot Jump Start T5 Grow Light System
![]()
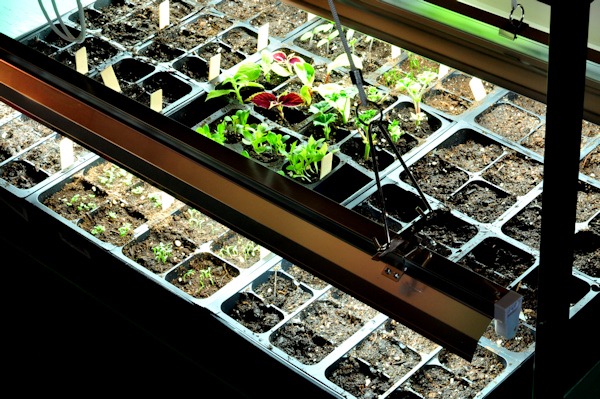 And these are the Early Girls I planted two weeks ago.
 There in the middle is a meeting of the future salads of America club. I need to get these in bigger pots already!
 I’ll keep you posted on the progress – I also have a lot of herbs started, as well as some perennials and annual flowers.
And wow – look at this already! Oh, wait. That is from LAST summer! I can’t wait….
Want to check out part two? Click here: Start Some Garden Seeds – a tutorial, Part 2
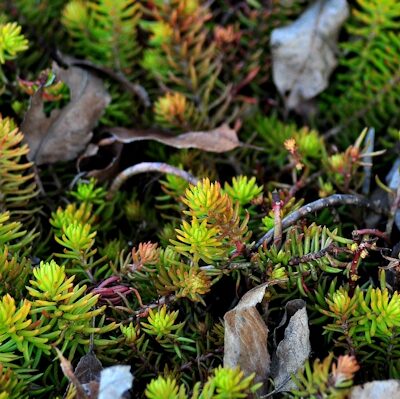 Favorite Plant: Sedum ‘Angelina’
 Happy 4th America!
 Hyperion
 Gardening all Year with AeroGarden
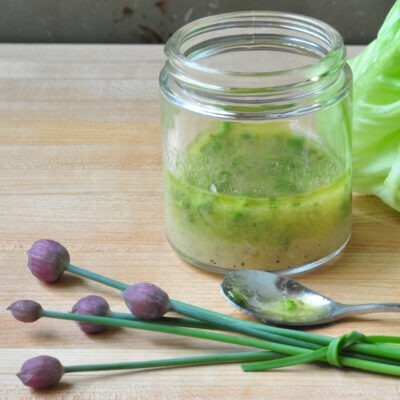 Chive Lemon Vinaigrette
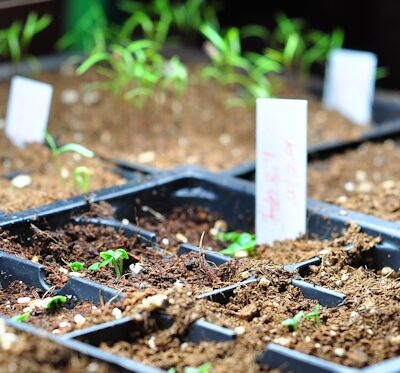 Start Some Garden Seeds – A tutorial, Part 2
 Achooo! or One of my favorite flowers: Helenium
 Spring Wake up Tonic for Daylilies
 Favorite Plant: Crocosmia ‘Distant Planet’
 Battling Late Blight on Tomatoes
Leave a Reply