This post may contain affiliate links. Please read my disclosure policy.
Vanilla Bean Ice Cream is simplicity itself
Summer. Such a happy word, with so many memories and feelings attached. Long hot days at the town pool. The incredible freedom of riding our bikes all over town. Laying on our backs and watching clouds float by through the canopy of our favorite elm tree. Another sweet childhood recollection involved sitting on the porch. We were waiting forever for the ice cream churn to give up its sweet treasure. Surely it must be done by NOW? With our big family, there never seemed to be quite as much as you wanted, but what you got was all the sweeter for that.

Making Ice Cream is easier now.
Now, I can make ice cream whenever I want it, and my ice cream maker doesn’t even take very long. I just always keep the inner bowl in the freezer. That way it is ready whenever the whim hits me. Wrap it in a plastic bag to keep the surfaces clean and free of frost.
Philadelphia or Philly style is so simple and easy. You can be eating homemade ice cream in no time at all. It has no eggs and no custard, so you don’t have to cook it or cool it down. I do like to use real vanilla beans, so I heat part of the cream to let it infuse more. You can use vanilla extract and have the mix in the machine in about 5 minutes.

Either way, it takes just 3 simple ingredients: Cream, Sugar, and Vanilla.

How to make Vanilla Bean Ice Cream {Philly Style}
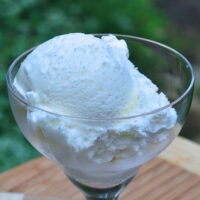
Vanilla Bean Ice Cream {Philly Style}
Equipment
Ingredients
- 3 cups light cream
- 3/4 cup granulated sugar
- 1 medium vanilla bean
Instructions
- Split the vanilla bean and scrape down both halves with the dull side of a knife. Put one cup of the cream, the sugar, and the vanilla seeds and bean in a small saucepan. Heat just until there are a few bubbles at the edges. Stir until sugar is completely dissolved and leave to steep for an hour or so.
- Strain the mixture in the pan into the other 2 cups of cream and chill completely. You can use 1/2 heavy cream & 1/2 milk, all half and half, or whatever combo of dairy you have on hand. [If you are in a real hurry, you can just stir the sugar into the cold dairy, until it is completely dissolved, add a teaspoon or two of vanilla extract and dump it all right into the ice cream machine.] I like to heat the cream to extract as much flavor as possible from the vanilla bean, so I mix the sugar into the hot cream. I’ve read that using cold cream to dissolve the sugar can result in a grainier final result. Philly Style ice cream is never cooked though. It’s going to be homemade ice cream either way, right?
- Churn according to your ice cream machine’s directions. In my Cuisinart, it takes about 30 minutes.
- Scrape the ice cream out of the churn bowl right away. Important if you use the same kind of ice cream maker I have, with the bowl that is frozen ahead of time. Leaving your ice cream in that canister could be a problem later when you want to get the ice cream back out – ask me how I know! I like to use a reusable plastic storage bowl for this – I’m not crazy about glass containers in my freezer.
Notes
This Philly style ice cream will stay fresh longer if you press parchment paper or plastic wrap directly on the surface – this will prevent ice crystals from forming on the surface. It will keep for a couple weeks, so if you have a party coming up, this is one thing you can get done ahead of time – assuming you have the will power to leave it alone!
Don’t have an ice cream maker? I recommend this one: Cuisinart 1.5 quart Ice Cream Maker. I’ve had mine for probably 15 years and it still works like new – not too pricey and a whole lot of happy!

Looking for more ice cream recipes? Check these out:
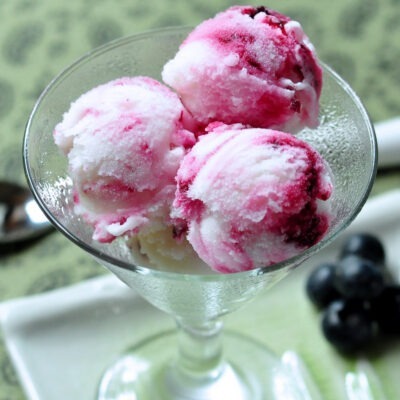 Lemon Blueberry Sherbet
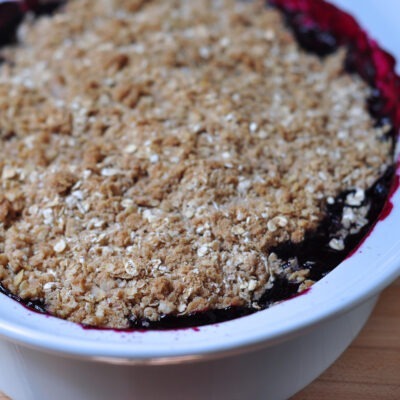 Blueberry Lime Crisp
 Blueberry Ginger Buttermilk Cake
 Homemade Greek Yogurt
 Double Apple Bourbon Cake
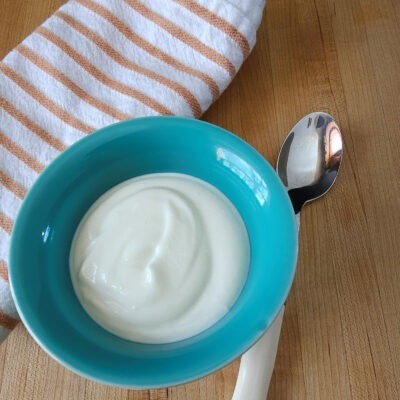 How to Make the Best Homemade Yogurt
 Coconut Lime Mini Muffins
 Coconut Milk Fudgesicles
 Lemon Spice Brownies
 Honey Lemon Crinkles Cookies
Leave a Reply